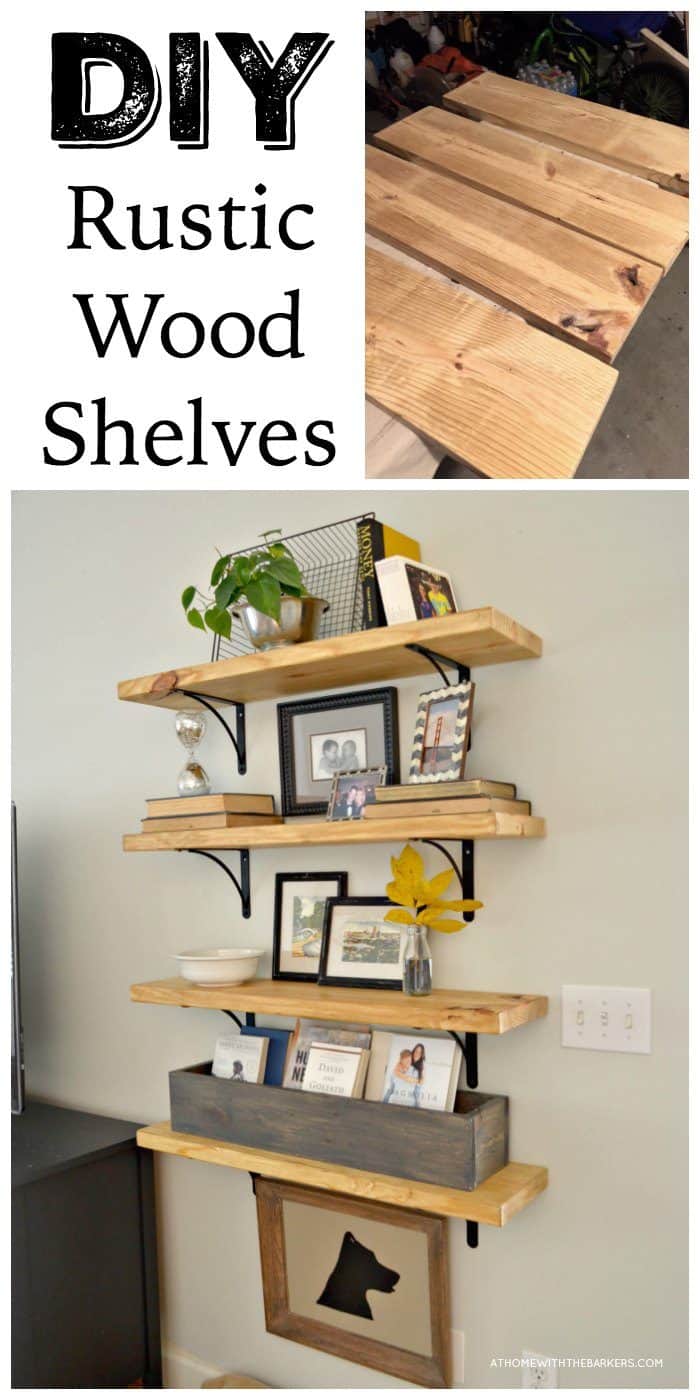
DIY Rustic Wood Shelves
Learn how to build these rustic wood shelves to give any room style. This easy to follow tutorial will guide you through each step.
This post may contain affiliate links. See my full disclosure policy.
DIY Rustic Wood Shelves
During our family room makeover for the One Room Challenge I wanted a place to display some personal items, mostly family photos. By nature I like less things and sometimes that can leave a room looking unfinished. I’m always working on finding a balance between too much and too little stuff.
If you followed along with the start of our makeover then you know I was hoping to complete the makeover without any help from Ray. Not because he doesn’t want to help me but he was in a really busy time at work. I asked if he would help me make some simple DIY Rustic Wood Shelves. After I showed him my idea and how simple they were he agreed to help.
Joanna Gaines is such a design inspiration to me. Her attention to detail is amazing. One thing I love in many of the homes she transforms on Fixer Upper is the natural wood. The cozy feeling you get from natural wood was what I was after.
Checking out our before and after home decor projects post will show just how some simple projects will change a space.
Supplies:
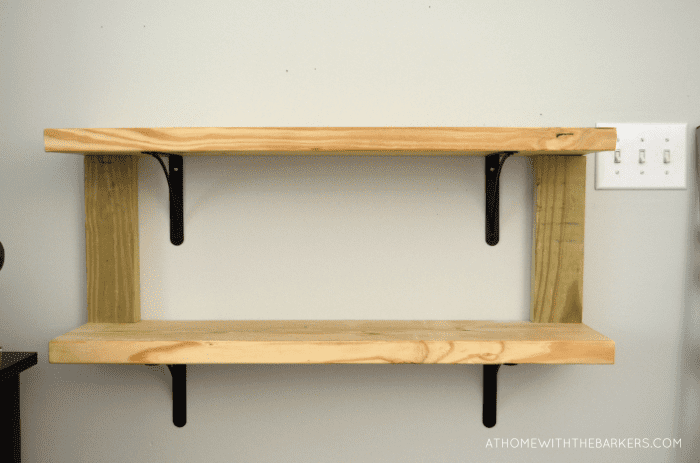
- 2- 2×10 Pine Boards (I chose boards with beautiful knots)
- Metal Brackets (2 per shelf)
- Electric Sander
- Antiquing Wax (Clear first layer, Dark second layer)
Step One:
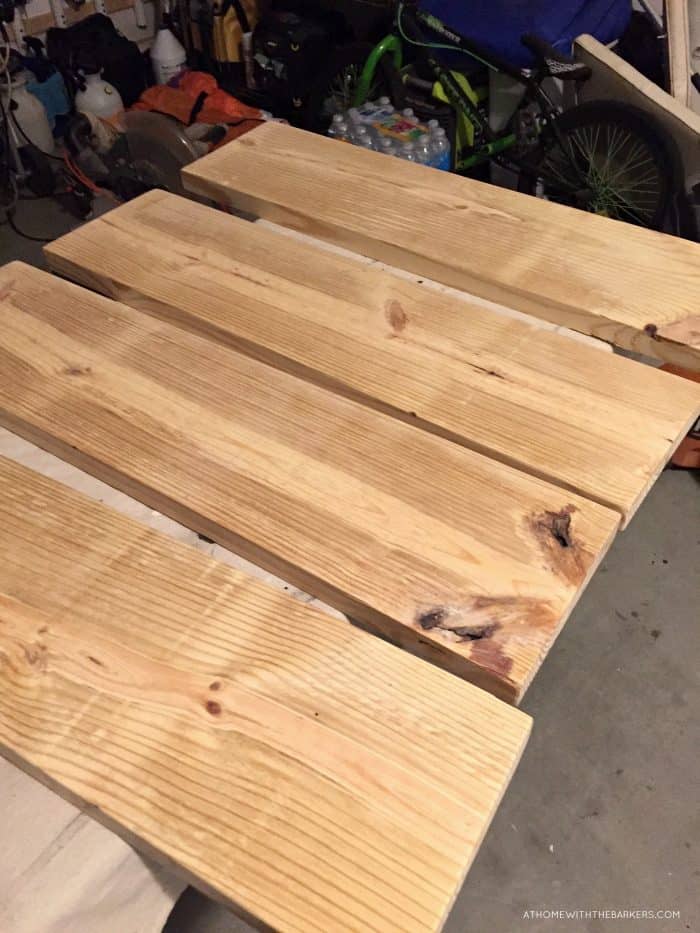
We bought 2X10 pine boards that had beautiful knots and some character. Although making sure they aren’t crooked before you buy is important.The length of the pine you purchase will depend on the finish length you want to make your shelves. Once we had our wood we cut them to 36 inches long. Choosing the 2 inch thick boards will make a big difference in the look of your project. I like the sturdy weight of the thicker boards.
This is the raw wood. The photo was taken at night with my cell phone in the garage.
Step Two:
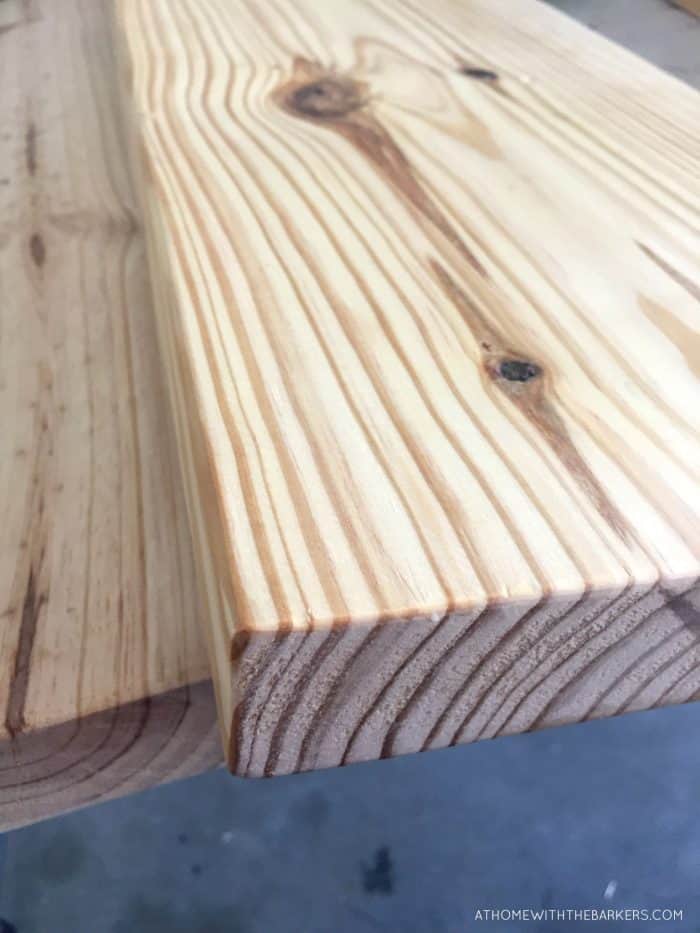
Once the boards were cut I sanded them all over. I wanted them smooth to the touch. A great tip when sanding is to round off all of the edges. This gives the wood a worn over time and finished look.
*See step five for clear wax step.
This photo below is more accurate for the raw wood color. Notice how the edges of the wood look after rounding them with the sander.
Step Three:
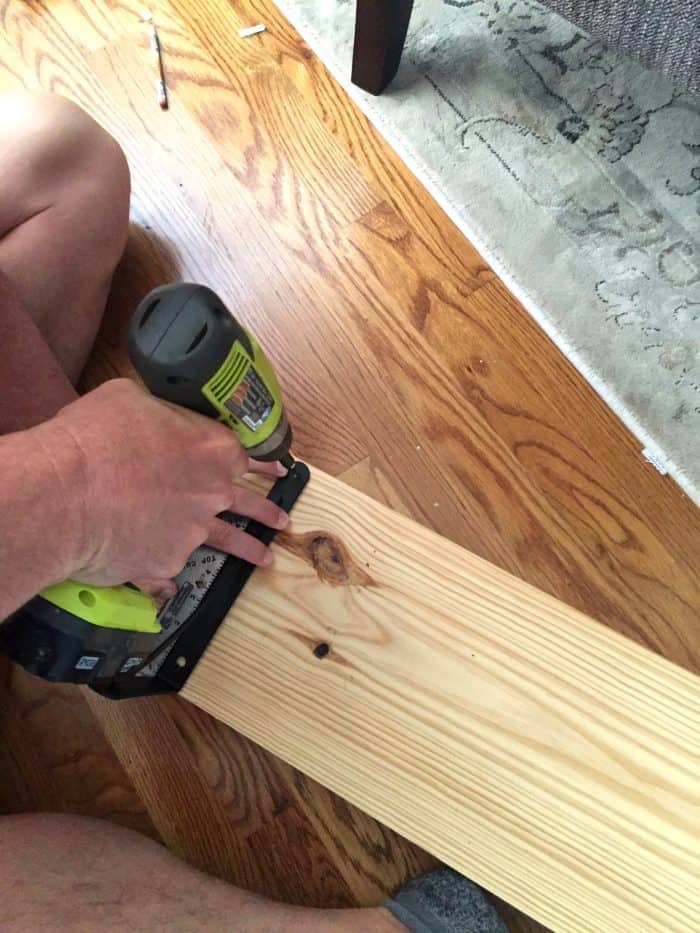
Measure and add the brackets all at the same time. I eyeballed the first set to see where I thought a good balance would be. I determined that 8 inches in from each side looked best. Square off the bracket for accuracy then use a pencil to mark your holes. Pre drill the hole then you can screw the bracket down.
Step Four:
The hardest part about this project is making sure the shelves are level but I think that’s the hardest part of most projects. Ray came up with a fantastic idea to keep the shelves level and evenly spaced.
He leveled and hung the first shelf based off the place I wanted the shelves to hang. Then he cut 2 pieces of wood (he used scrap 2×4’s we had on hand) measured for the distance I wanted placed between the shelves. I went with 13 inches between each shelf.
He then lined those 2 pieces of wood up at the very edge of the shelf before adding the next board. This allowed the distance between each shelf to be the same as well as lining the shelves up in a straight line.
Step Five:
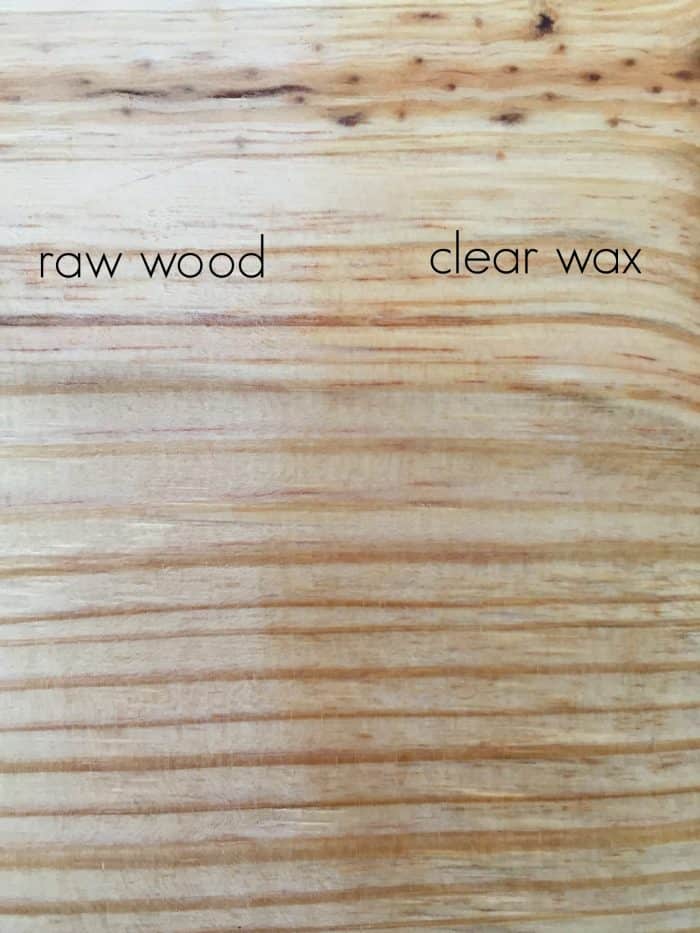
Waxing was really a two step process but thought I would share it together here. If you noticed in the supplies list I used both clear and dark was. When dark wax is applied first to raw wood it will change the wood color a great deal. By applying the clear wax layer first then the dark antiquing wax you get a more subtle look.
This happened to be the look I was after but you can certainly use dark wax only. I would take a piece of scrap wood and make a couple of samples to see what you like best. This red furniture piece, as well as this gray one, I painted was coated with dark wax only and both looked amazing.
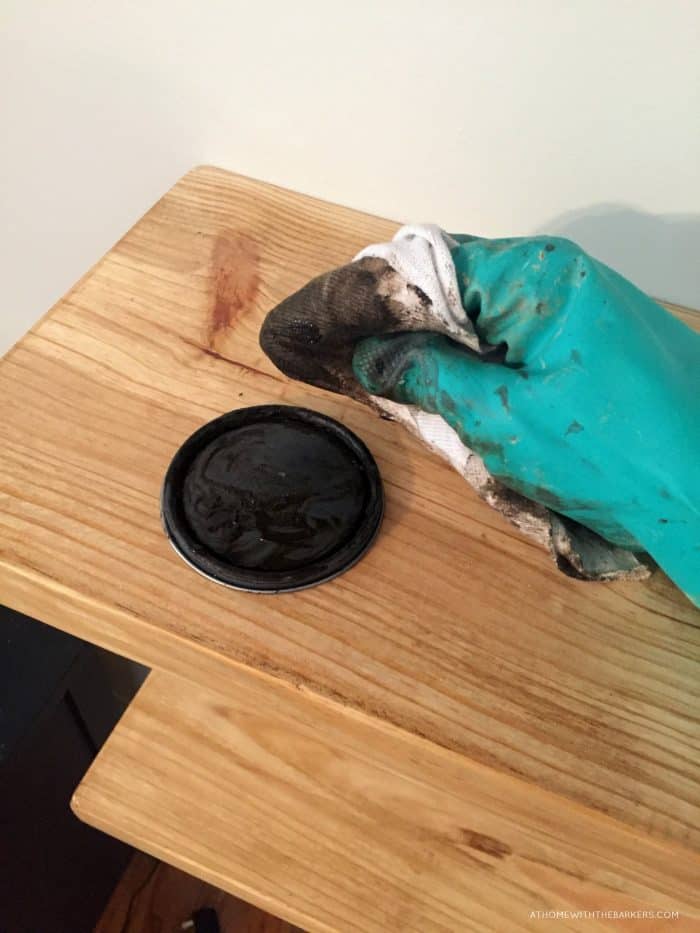
So, after I sanded the boards in the garage I applied a coat of clear wax to all sides. Once they were hung I applied the dark antiquing wax as needed. No need to waste wax on places that would never be seen like the very top and bottom. Plus this allows you to add more dark wax to corners and edges where wood would naturally wear more.
The clear wax just enhances and seals the wood. It brings out the color and grain some. The below photo shows the difference.
Dark wax adds even more detail to the wood.
I like to rub the wax in with a rag then wipe off right away.
I am super happy with how this project turned out in our family room. This once plain wall now has added detail and personality.
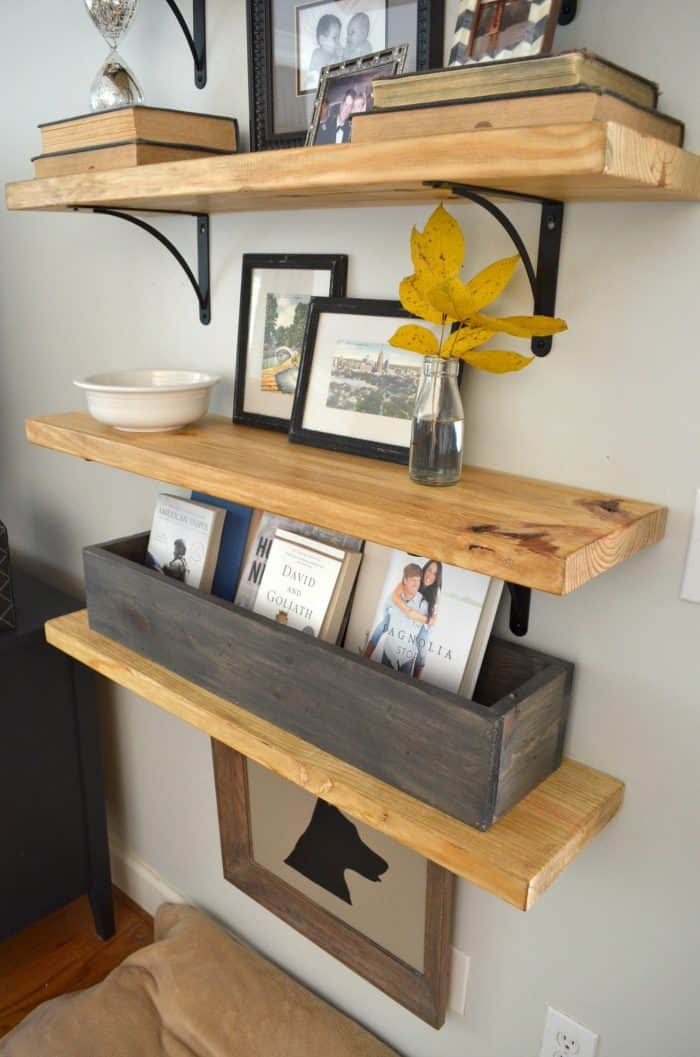

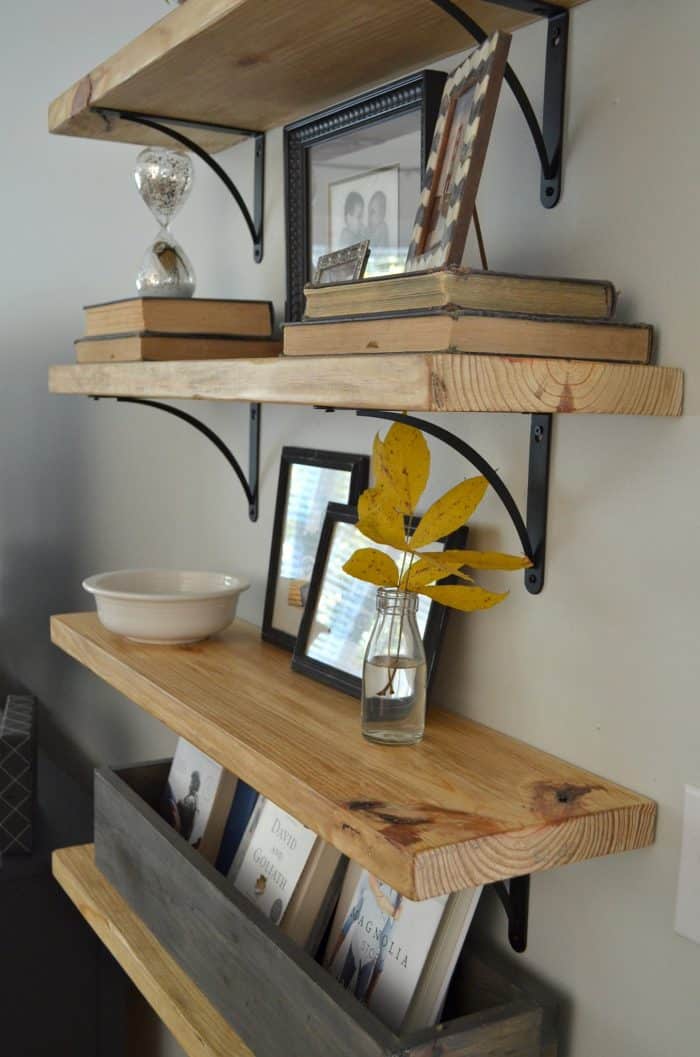
I tried a gallery on this wall and as much as I loved it in photos from others home it was too busy for my style. Trying different things is the only way you can learn and figure out what you really love.
I usually do have a gut instinct at some point during a project. Like with the gallery wall, I had a feeling half way through that something wasn’t quite right but I finished. I left it that way for about 3 months until my husband and daughter told me they didn’t like it.
We live and learn!
Sonya
Your shelves look great!!!
We are about to hang some shelves in our dining area on either side of the wall hung tv and your instructions will help me TONS…thanks.