DIY Jewelry Organizer {in 20 minutes}
My daughter and I thought that a snow day would be the perfect time to get her DIY Jewelry Organizer completed for her closet. She has been going through and organizing her closet and she decided she should do the same with her jewelry. I told her we could make something to hang all of her stuff on. Of course, she loved that idea!
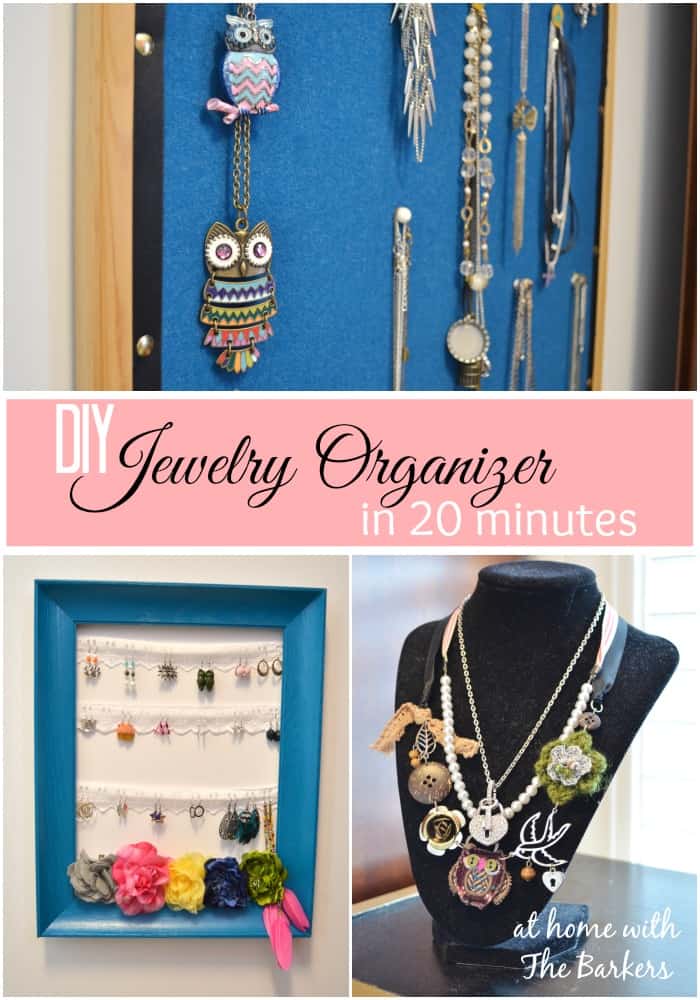
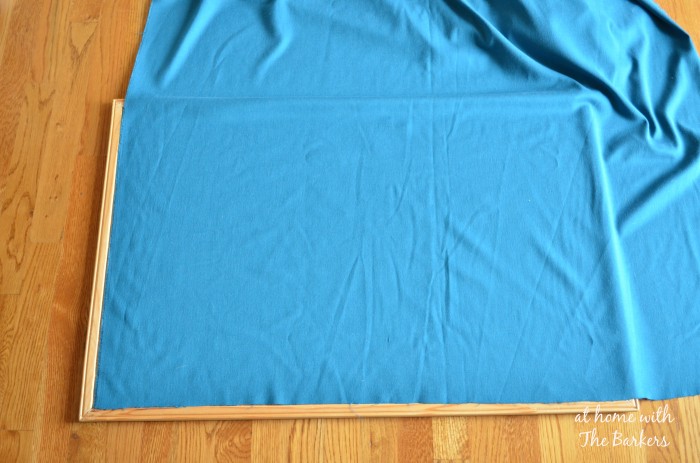
It took only about 20 minutes to complete and it is perfect for all of her necklaces. We had an old cork board that wasn’t hanging up anymore so I knew that would work great. I also had fabric that I found on clearance at Walmart for #1.50 a yard. Since I am a fabric lover (aka hoarder) I couldn’t pass this up. I went ahead and bought all 5 yards that was left. We plan on making a blanket with the fabric as well to fold across the bottom of the bed.
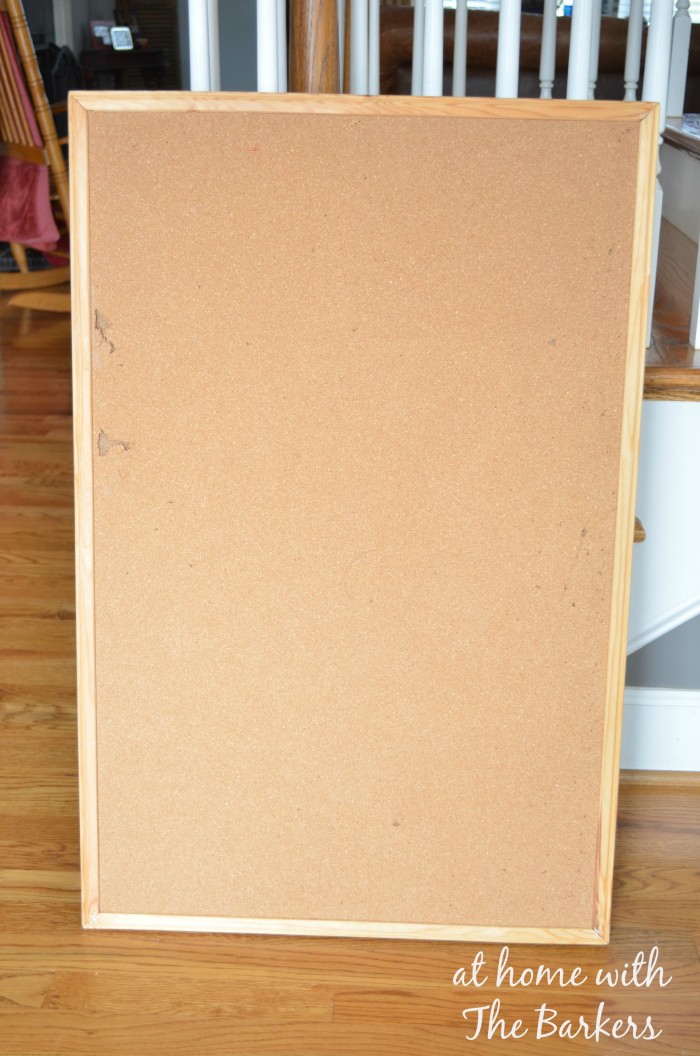
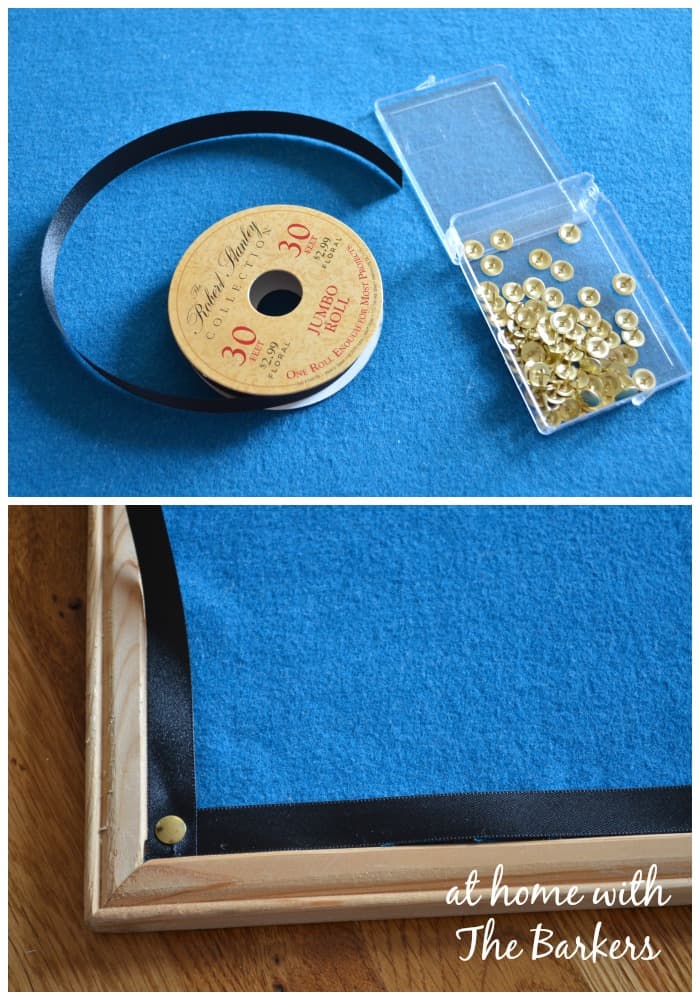
First I cut the fabric to the exact size of the cork space just inside the wooden frame.
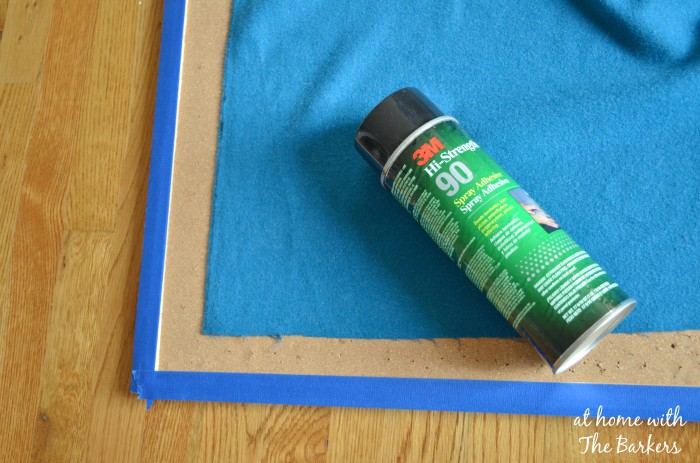
Then I took painters tape and covered the frame before I sprayed the cork with a spray adhesive. I didn’t want my frame to become sticky. I went outside to do the adhesive because I didn’t want over spray on my floors.
After the fabric was stuck down to the cork I trimmed the inside of the fabric, next to the frame, with black ribbon and gold thumb tacks. This was a nice added detail but it also was a way for me to cover the raw edges of the fabric.
Now, this DIY Jewelry Organizer has it’s place in my daughters closet. It looks so good in there and it really only took me 20 minutes!
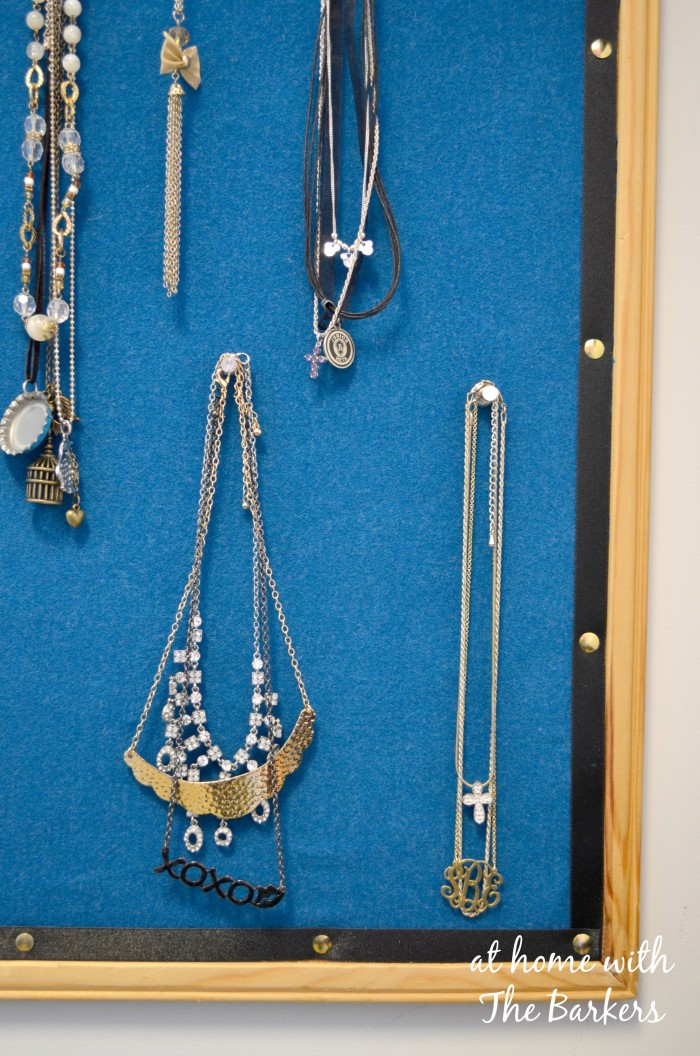
I’m sure there will be lots more things added, maybe bracelets, but we used all of our push pins.
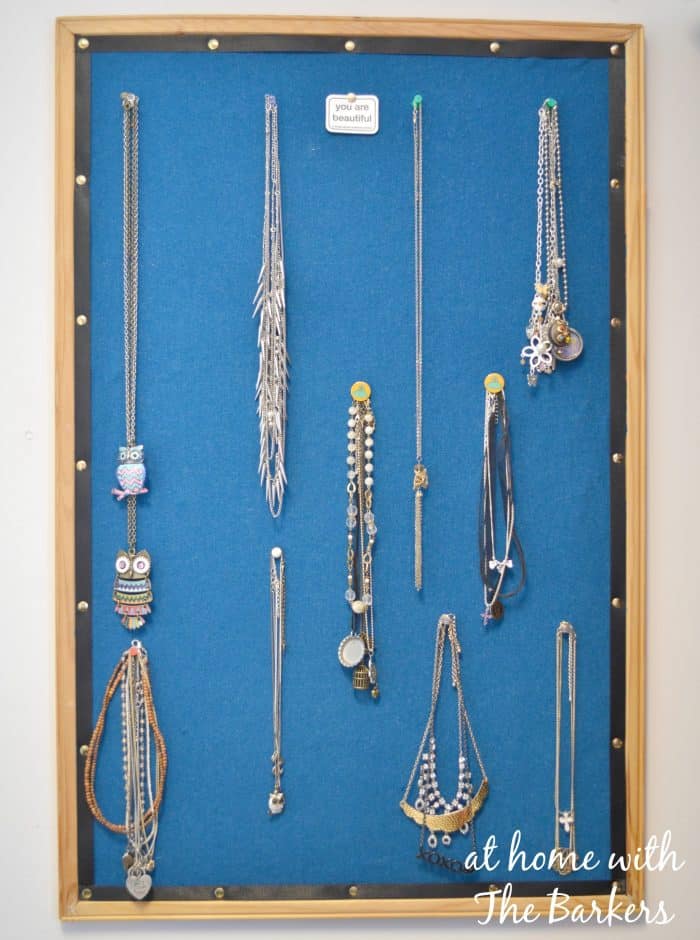
You can see from the picture below it is hanging right inside of her door. Oh, did you notice the earring holder under the necklace jewelry organizer? My daughter thought of that one!

We already had an empty frame and the spray paint from other projects in her room. We went to our ribbon stash and pulled out the eyelet lace. Then I used my staple gun to attach the ribbon to the inside back of the frame. The eyelet lace is perfect for hanging earrings on.
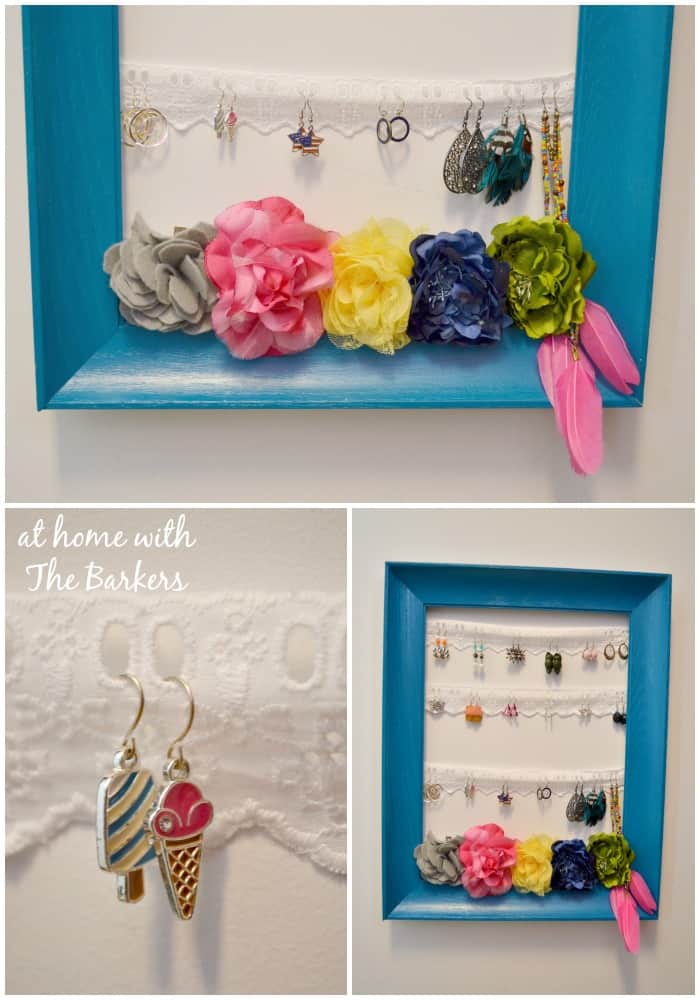
Now you actually have two 20 minute DIY Jewelry Organizer’s! Be sure to subscribe to my blog so that you will not miss any of my post! They will arrive straight to you email
Head on over if you’d like to see a teenage girl room tour!
Have a great day,

Linking up with The Scoop at Cedar Hill Farmhouse
YES, she loves it Paula! Now I’m thinking I need to do one for my jewelry!
What a great idea! I’ll bet that your daughter loves being able to see every piece of jewelry that she has.
Thanks Nancy!!
That is awesome, I’m so happy that you can use this idea! Good Luck with your fundraiser, I know all about those! ~Sonya
Meant to say. .. Love the lace idea for the earrings too! ! So cute!
Nancy
You’ve inspired me to “pretty up” my cork board! ! 🙂
Sonya, that is so cute and timely for me, too. I’m helping my husband organize a huge thrift sale as a fund raiser for his JROTC students to go to Florida from Albuquerque for the National Drill Championships. There are tons of jewelry donations and, of course, little time so your ideas will help to display much of it. Your daughter’s room looks so pretty and it seems like she’s creative, like her mother! Thank you for sharing with everyone. Dena
Thanks Beth!
This is super cute girls!