DIY Wood Desk building tutorial
DIY wood desk building tutorial to fit into any home, dorm or apartment. This tutorial will teach you how to build your own wood desk. Whether you are working or leaning from home, or headed back to college, this desk will work great.
This post contains affiliate links. See full disclosure policy.
Almost back to school time. A great place to study is a good start to the school year. Having the best school year ever is so important.
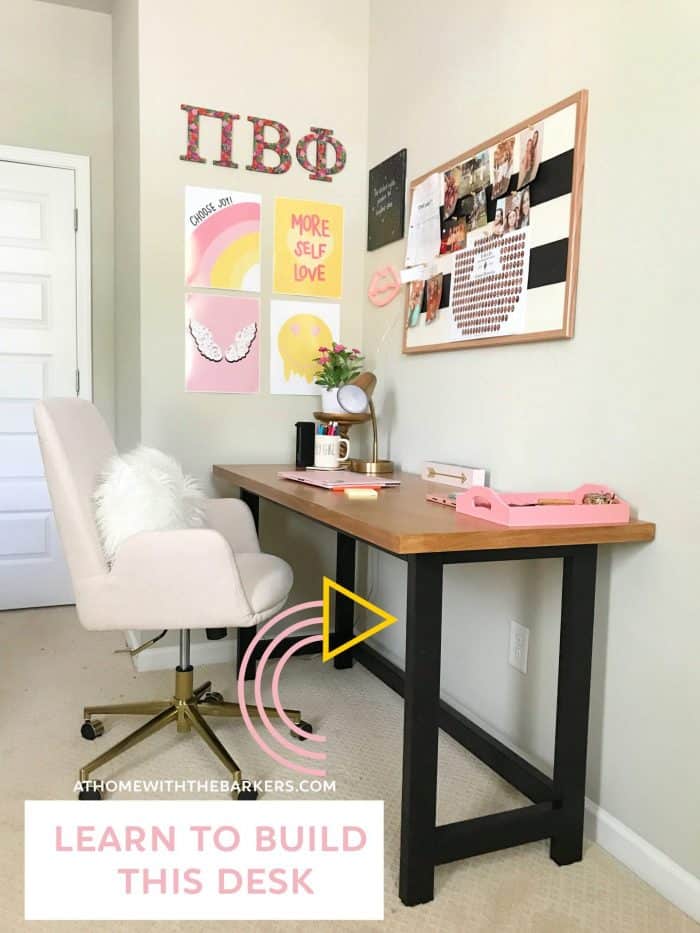
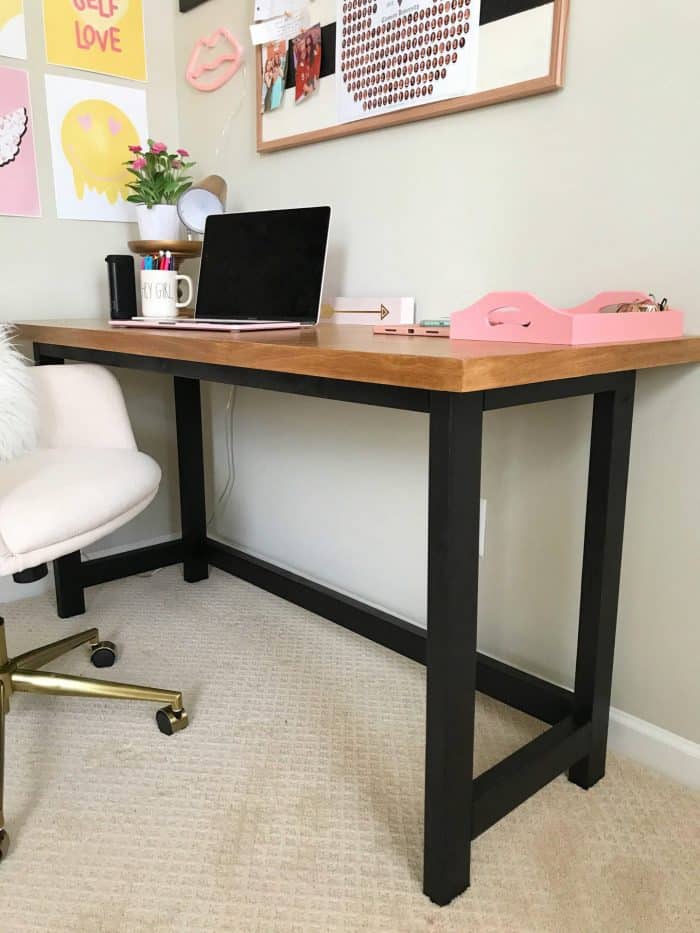
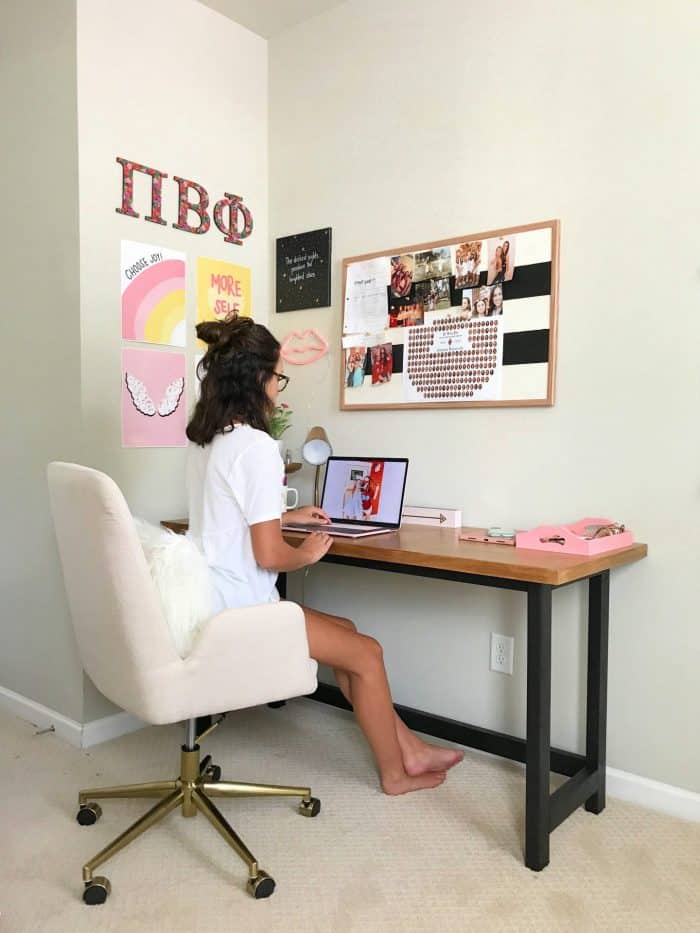
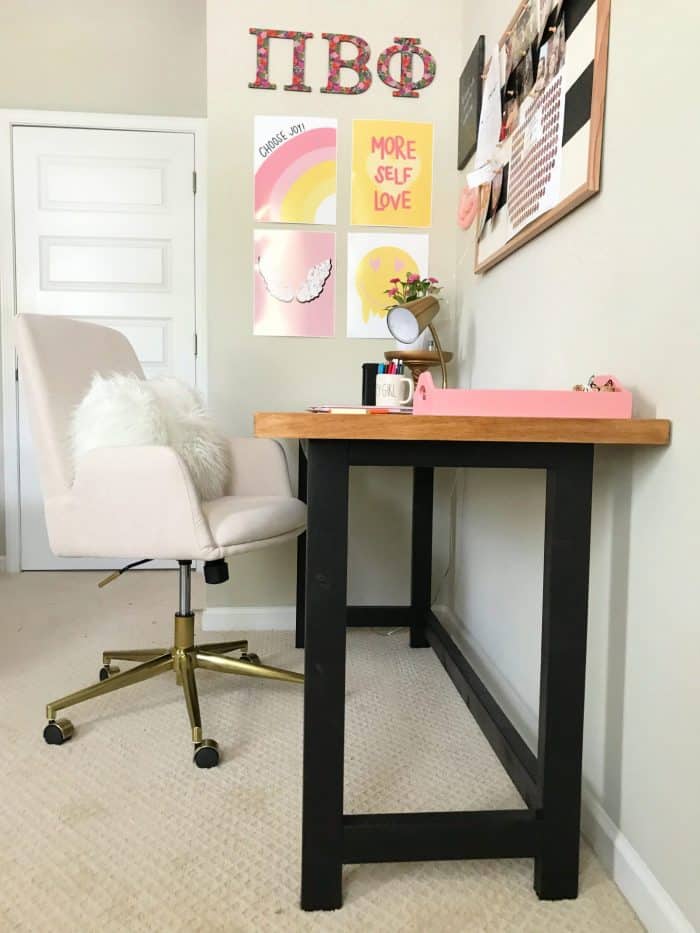
We decided to build a desk for our college age daughter back in 2020. She just got married and will now use this desk for work in her own apartment. Keeping it simple was our goal. It is a table style DIY wood desk.
This DIY flower box I built a few years ago ended up in her dorm as a bedside caddy.
The first thing I always ask myself or Ray, can we build it instead of buying it. We don’t build if it will cost us more than buying.
Building the DIY wall mount wood headboard for her room at home was also one of those projects we asked ourself the same question.
We didn’t want to add drawers because most of us have a tendency to just cram things in them. Not having drawers allowed us to keep the cost and build time down too. Win win.
I took inspiration from this desk at Pottery Barn. Wood top with metal look wood legs.
Whether you’re working from home, virtual learning, or need to sit to pay the bills, this is a great desk option. Read on to see how we built this one.
How to build a wood desk
Overall desk dimensions 24 deep, 60 long, 31 tall.
Supplies for desk build
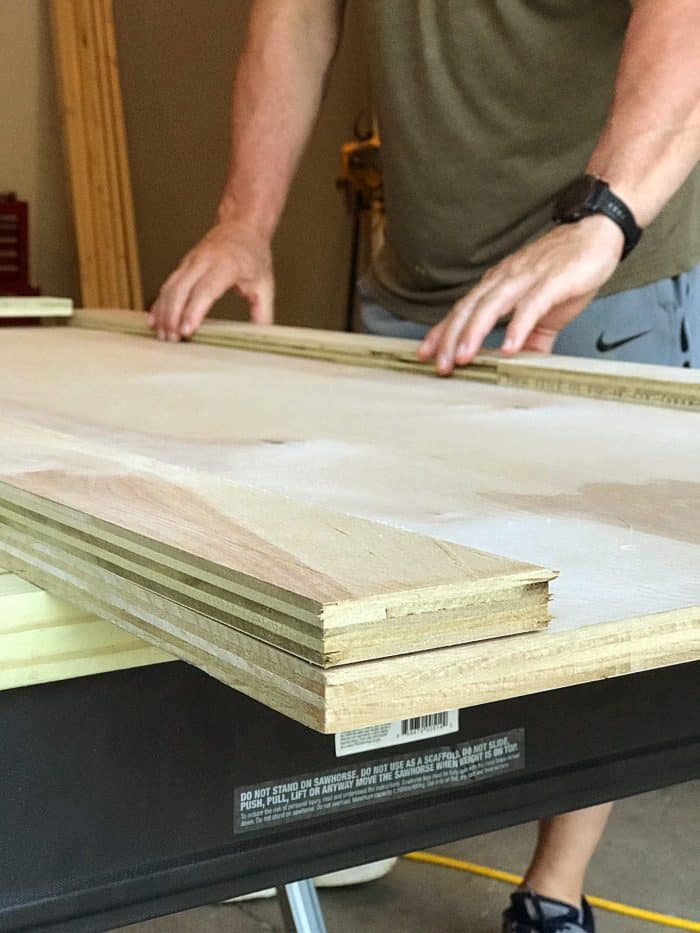
- Birch plywood 4 foot wide, 8 foot long, 3/4 inch thick
- 4 2×3 pine boards
- Birch edge banding
- Wood glue
- Miter saw (currently on sale)
- Nail gun
- Kreg jig
- Square
- Stain (used gel stain I had on hand but you could try this highly rated gel stain)
- Polycrylic (we used satin)
- Sanding block (220 for birch, 120-150 for legs)
- black paint (my favorite best black paint colors)
I estimate this desk cost around $75 in material. We didn’t waste the leftover birch. We are using it for a closet makeover. The chair is similar to the one in the photo.
Our Favorite Off To College Amazon Finds
Wood cuts for desk build
Desk top (birch plywood)
- birch top 24×60
- birch strips: 2 (1 1/2×60) 2 (1 1/2×24) This is to double up the width of the tabletop in appearance only without adding lots of weight to the desk
- birch plywood is semi-soft wood so be careful when you cut it, it can leave marks if you drag it around on something rough
Desk legs and apron (pine 2×3)
- Leg length 4- 30 1/4
- apron boards: 2 (50 3/4) 2 (12 3/4)
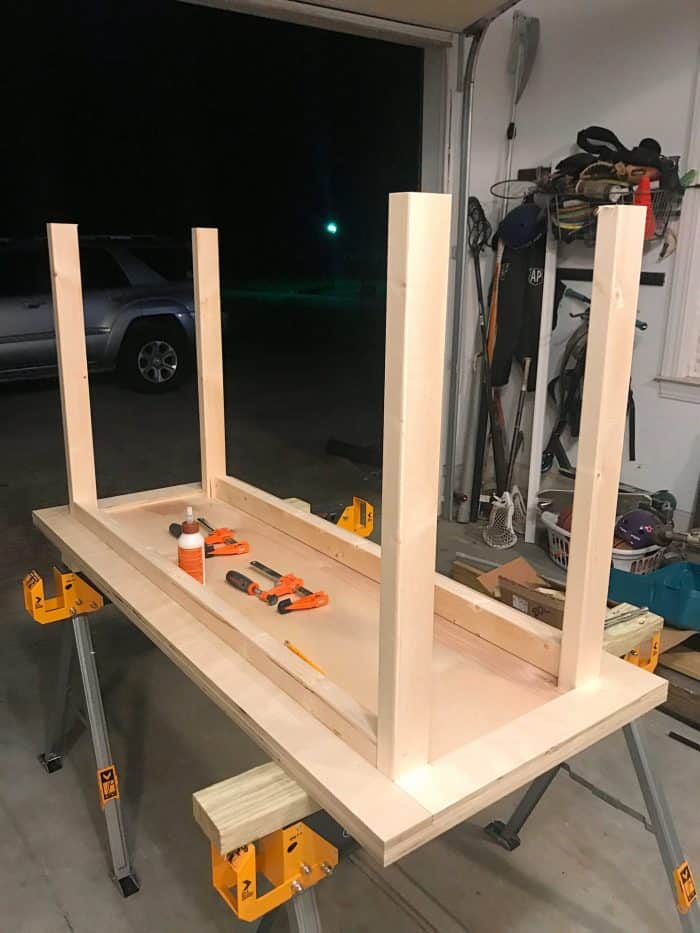
Assemble desk
Take birch desk top and flip over so the bottom is facing up. Both sides of the wood look similar. You decide which side you prefer for top. Add the birch strips you cut to create a frame around the entire desk bottom.Wood glue first then tack in place with nail gun.
**ALWAYS make sure your nails aren’t too long. The last thing you want to happen is for a nail to come all the way through your wood.
*Pre-drill pocket holes for the apron and legs
Next layer in your pine 2×3 aprons and desk legs. Line up your aprons to the birch strip frames. We added the longest aprons first, then legs, and lastly the short side aprons.
**Be sure everything is squared up with this tool.

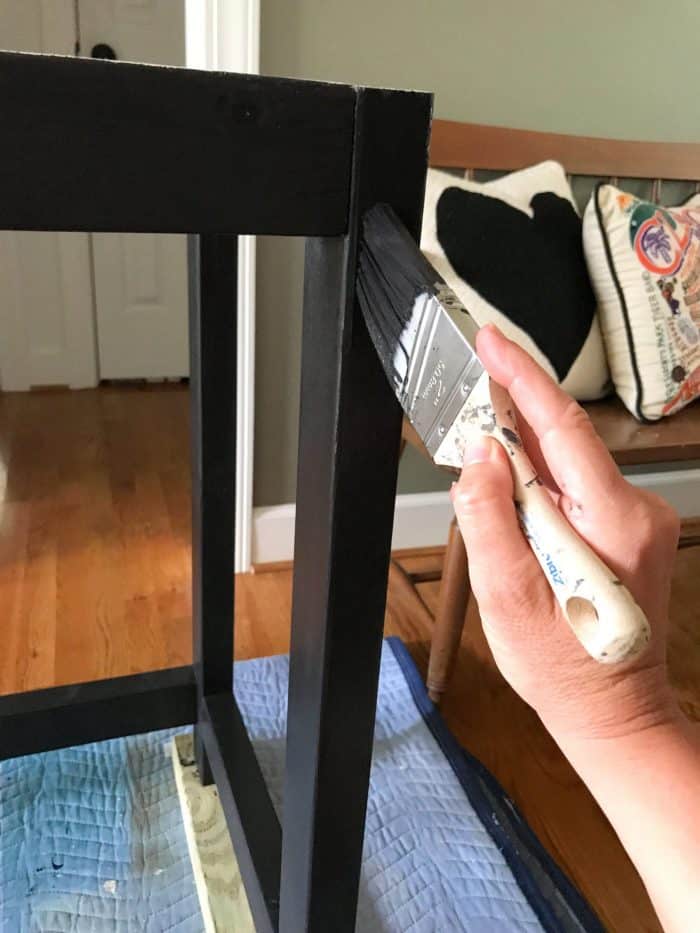
Stain and Painting the desk
This is the part that is up to you. I wanted the stain top and metal bottom look. I used a gel stain on the top. Using the wipe on, immediately wipe off technique, I was able to get the shade I like. Try this top rated gel stain.
By painting the legs black I was able to achieve the metal look. Real metal legs would have been very expensive. Lots of options for black paint but I went with one of my tried and true shades, in a sample container. The color I chose was Tricorn.
TIPS
- Polyurethane yellows over time because it is oil based. I use Polycrylic which is water based therefore doesn’t yellow.
- Buy a fine tooth blade to make smoother cuts on your wood with out having to sand. This small project I was fine with a quick sanding. If you do however have a fine tooth blade, use that. We used a construction blade on our miter saw. That is why I had some rougher edges.
- Give appearance of thicker wood by adding wood strips to the sides of the desk without the extra weight.
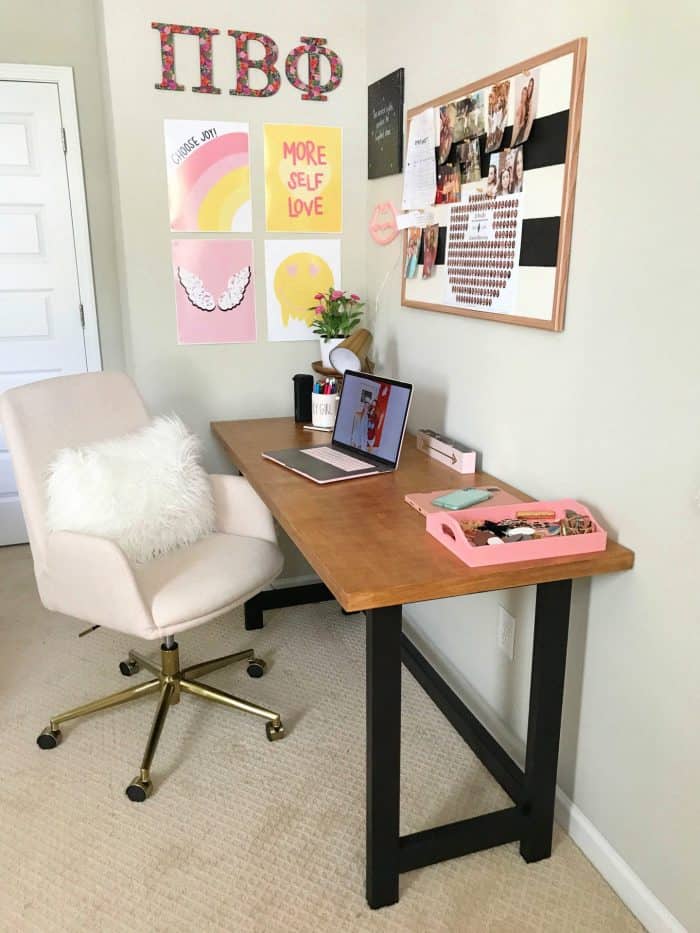
That is it. A sleek yet simple style wood desk for any work situation. Now look how great it looks in my daughters apartment at Clemson. She loves the chair.
If you build your own desk I’d love to see it. Message me here or on Instagram.