Hardwood Floor Refinishing and everything you need to know
Learn everything you need to know and what you need to do before you have your hardwood floors refinished. Sharing our experience that made our floor refinishing project go smoothly without too many surprises.
Making the decision to have your hardwood floors refinished is a big one. It’s costly and a definite interference with daily life at home.
This post contains affiliate links.
We did not DIY this floor refinishing project. We contracted Mr. Sandless of Greenville (Chase Ford) to do the work. This post is not sponsored. We paid them to do the work.
We are adding this to the best before and after home decor projects to date.
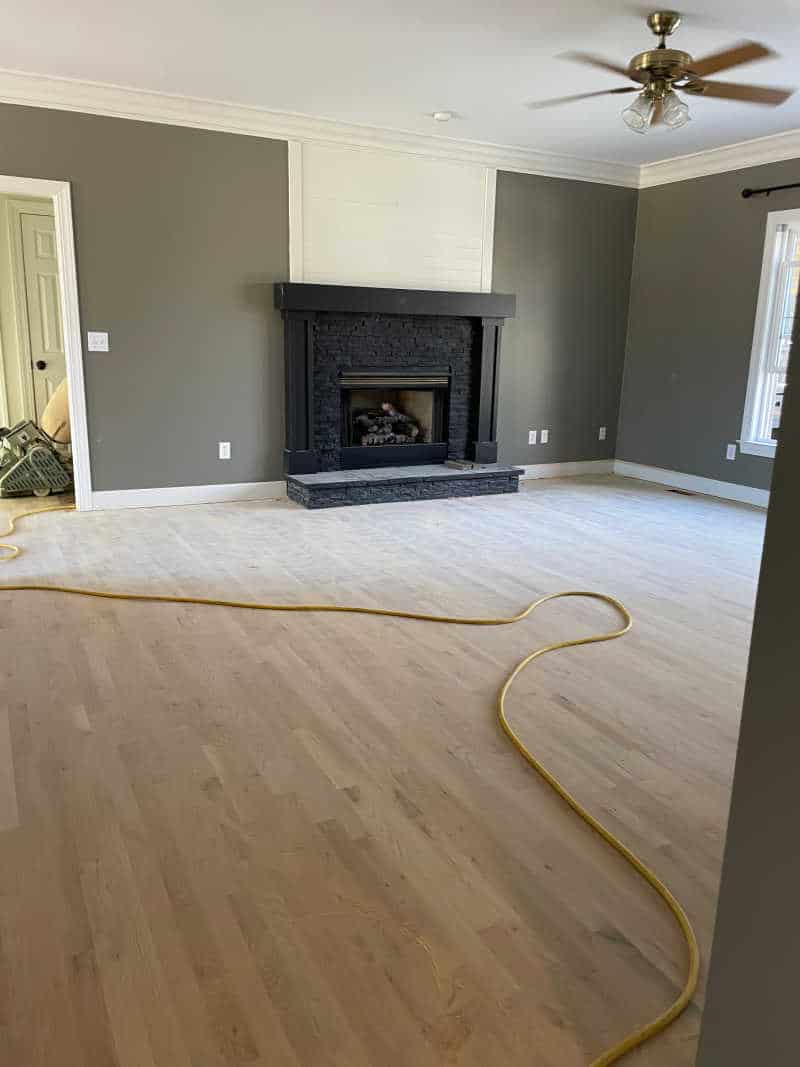
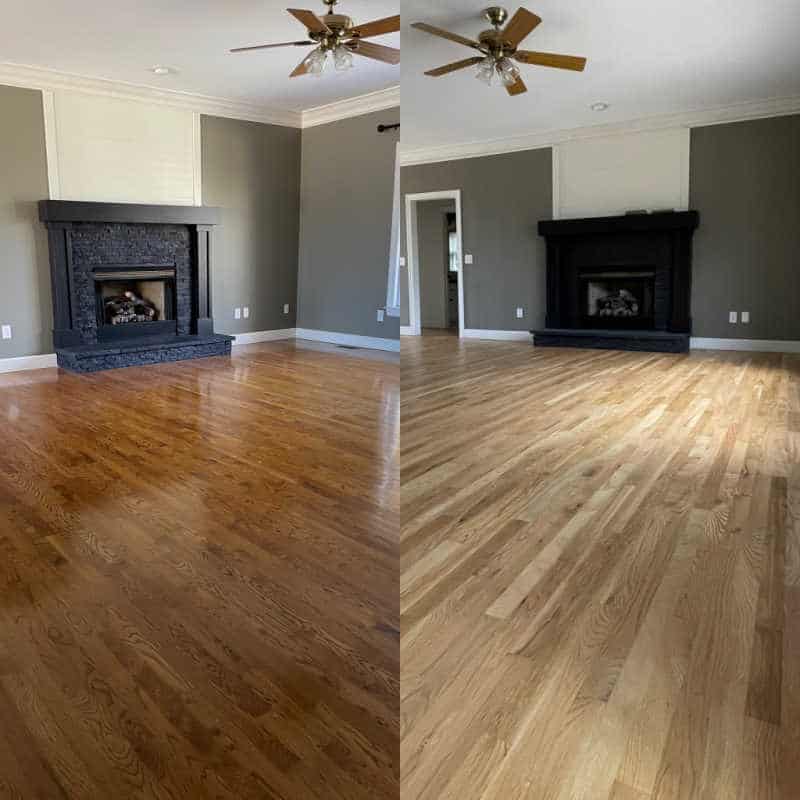
We have wanted our floors refinished for a few years now. They are approximately 20 years old and in desperate need. I’ve spent many years getting our dull floors to shine with product.
Plus, I wanted to change the color. The old stain was a little dark and had seriously yellowed over time. I felt like think the lighter floors will also look great with the black painted fireplace.
The yellowing, also called ambering, is from polyurethane. Polyurethane is oil based and UV light changes the color of it over time.
This is also true for oil based paints. Have you ever wondered why your white time no longer looks white? Probably because it’s oil based.
If you have oak floors that you cannot change there are ways to make them look good. Check out how to update honey oak blog post I wrote that will help you decorate around them.
How to know your hardwood type
Determining what type of wood your floors are made of can be tricky. Especially if you bought a house with already stained hardwoods.
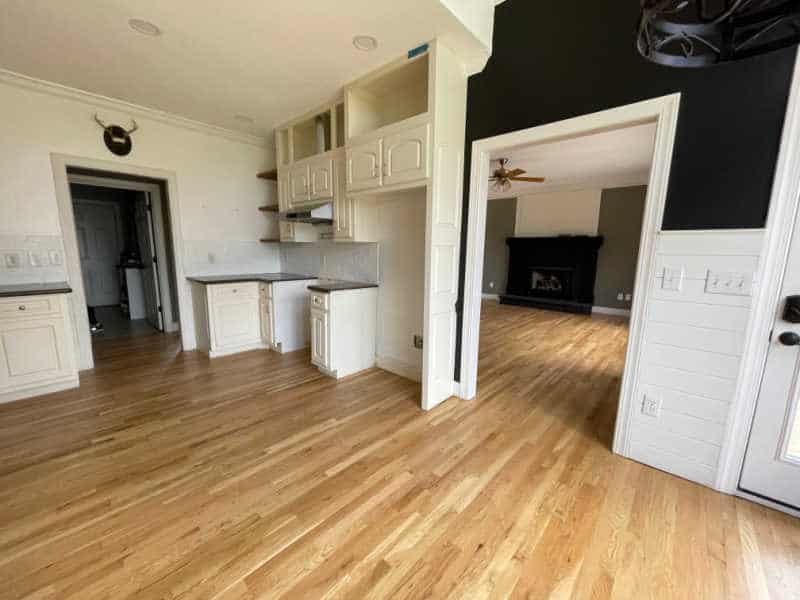
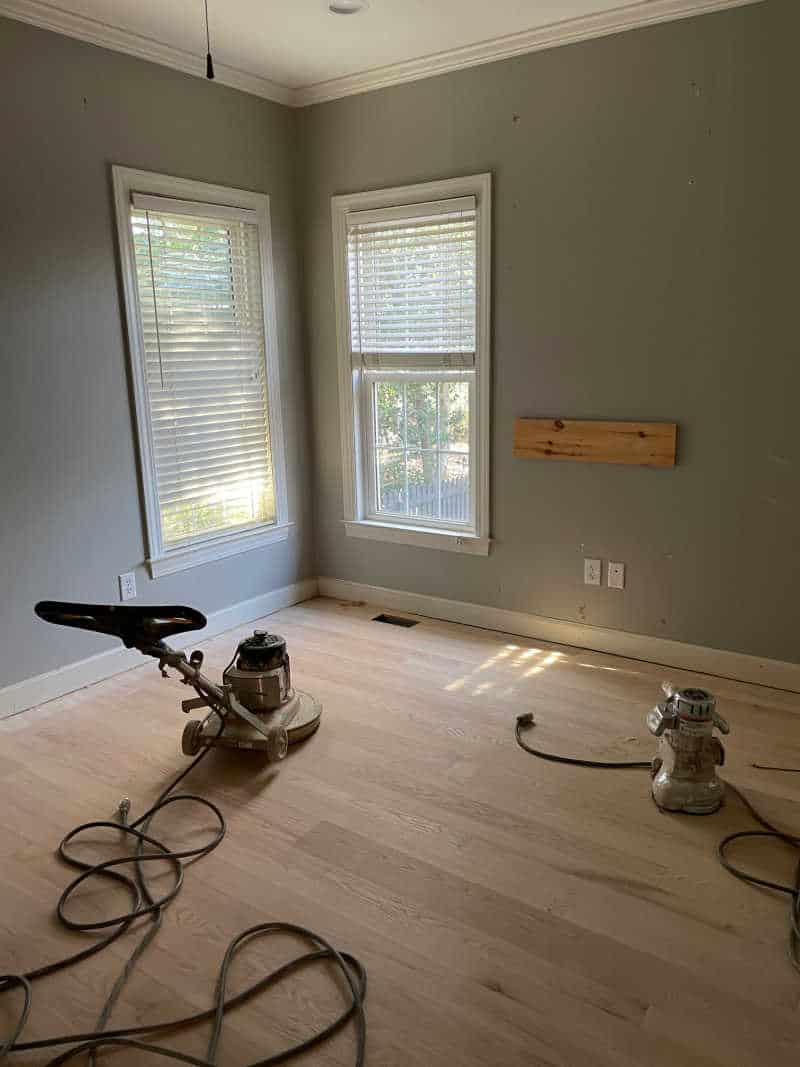
This was the situation we were in. Ray’s office and our guest bedroom had red oak because we laid it. The rest of our main floor (living, dining, foyer and kitchen) were done prior to us buying our home. We could tell they were oak, just not sure if white or red.
The yellowing of the polyurethane and the darkness of the stain can make it very difficult to assess. The best way to tell is to see the end grain of the wood or wait until you have sanded the floors raw.
Making final color (stain or clear) decisions will be harder until you know the wood type.
I knew I wanted our lighter with the natural wood showing. Since we had oak, I was pretty confident in my decision of a clear sealer. Turns out, all of our main living area is a mix of mostly white oak with red oak added in.
Chase, our floor guy, said it happens often when builders want to use up products they have. It’s a way to save money. Since the floors are most often stained, it’s never noticeable.
Red Oak vs White Oak
Whether your hardwood floors are red oak or white oak will determine how they look after refinishing. Not only will the sealer or stain make them different, the light from the windows will as well.
Red oak can have notorious pink wood tones. Some much more than others. This was my biggest worry. I didn’t want too much pink. The two rooms where we laid the red oak do have more warm, pink boards but I am still very happy with sealing them with a clear finish.
The biggest trend right now with hardwood floors is super light, almost one complete color. This was not the look I was going for. I prefer variation. There are ways to neutralize the color of your floor with a white stain but this is not what we did.
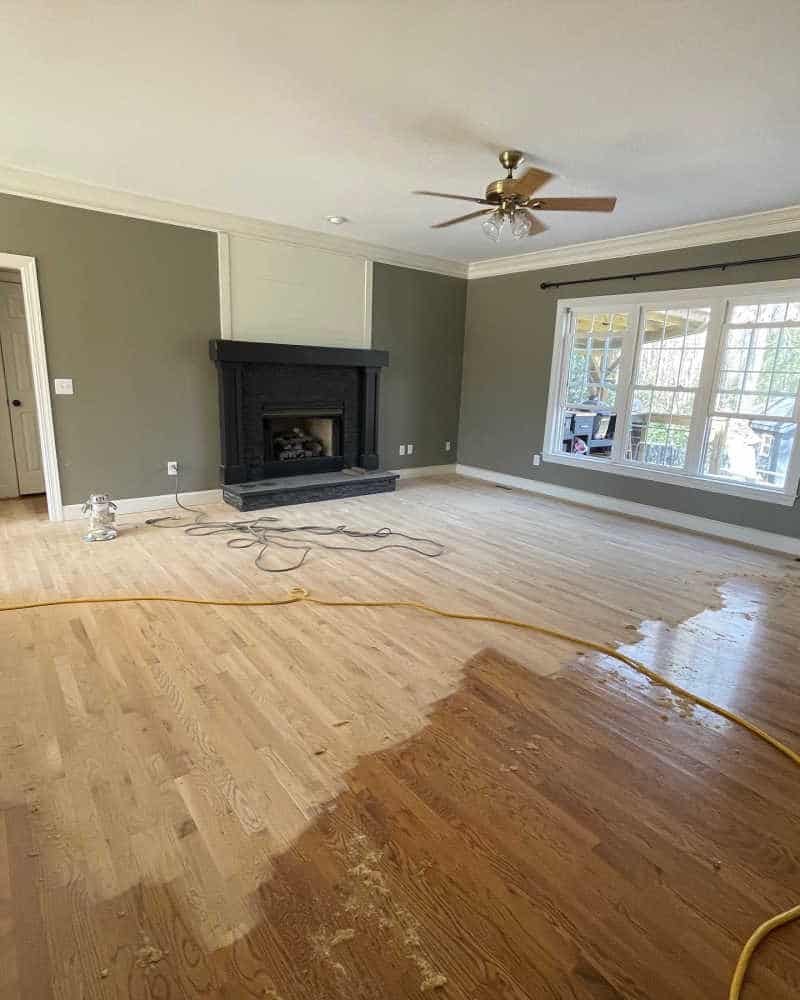
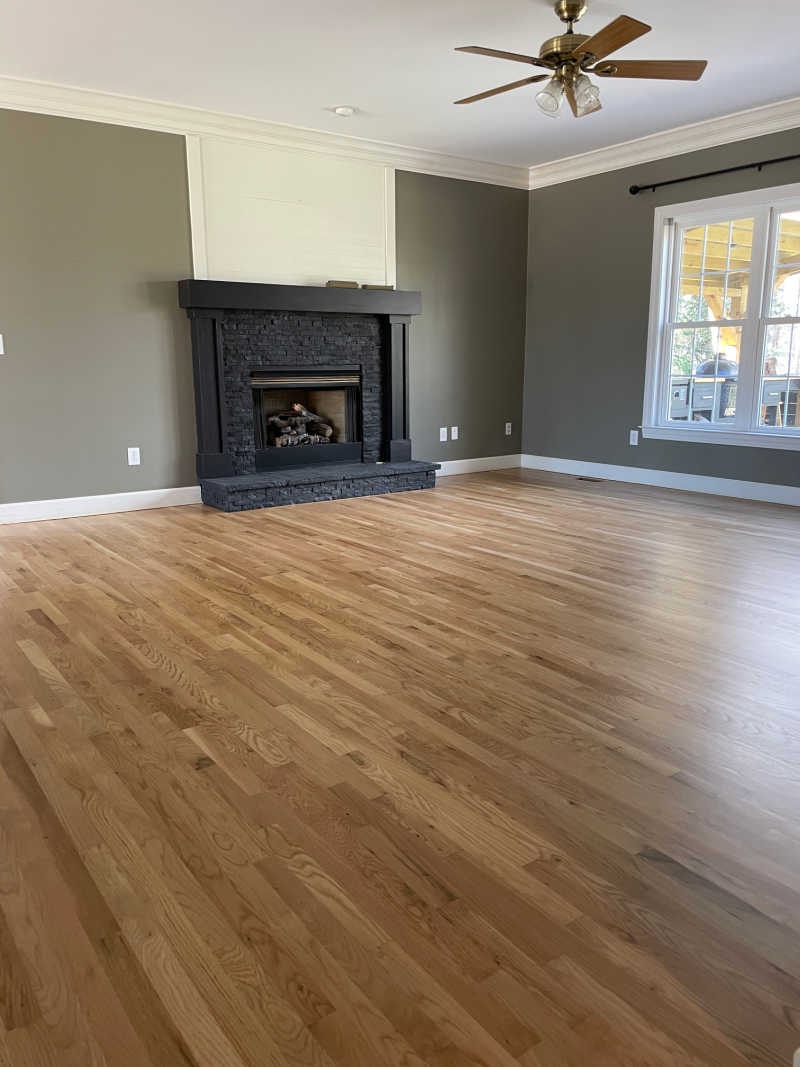
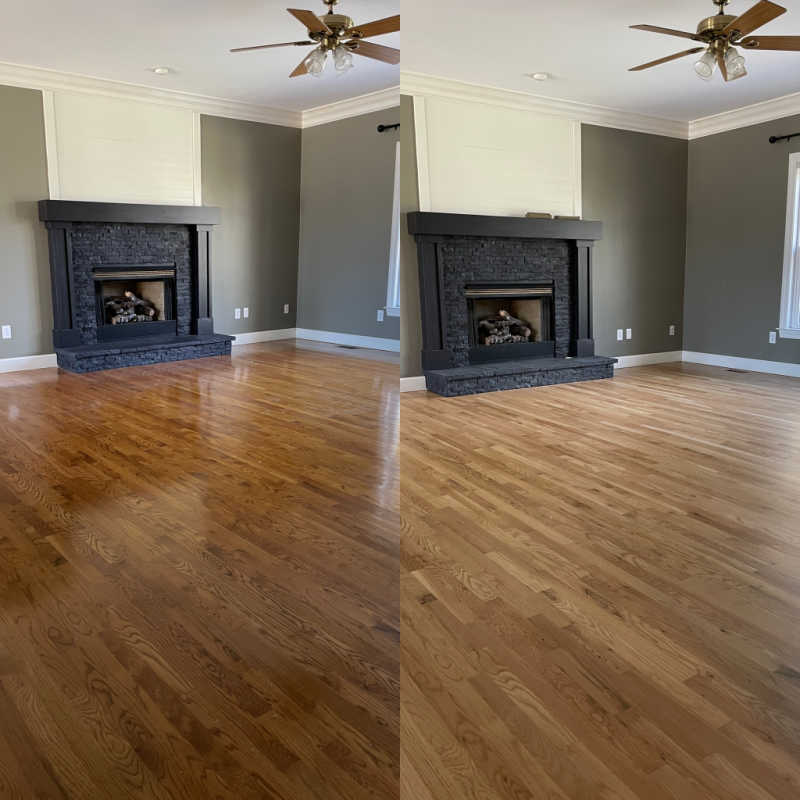
This is our floors after. You can see they are much lighter but still warm.
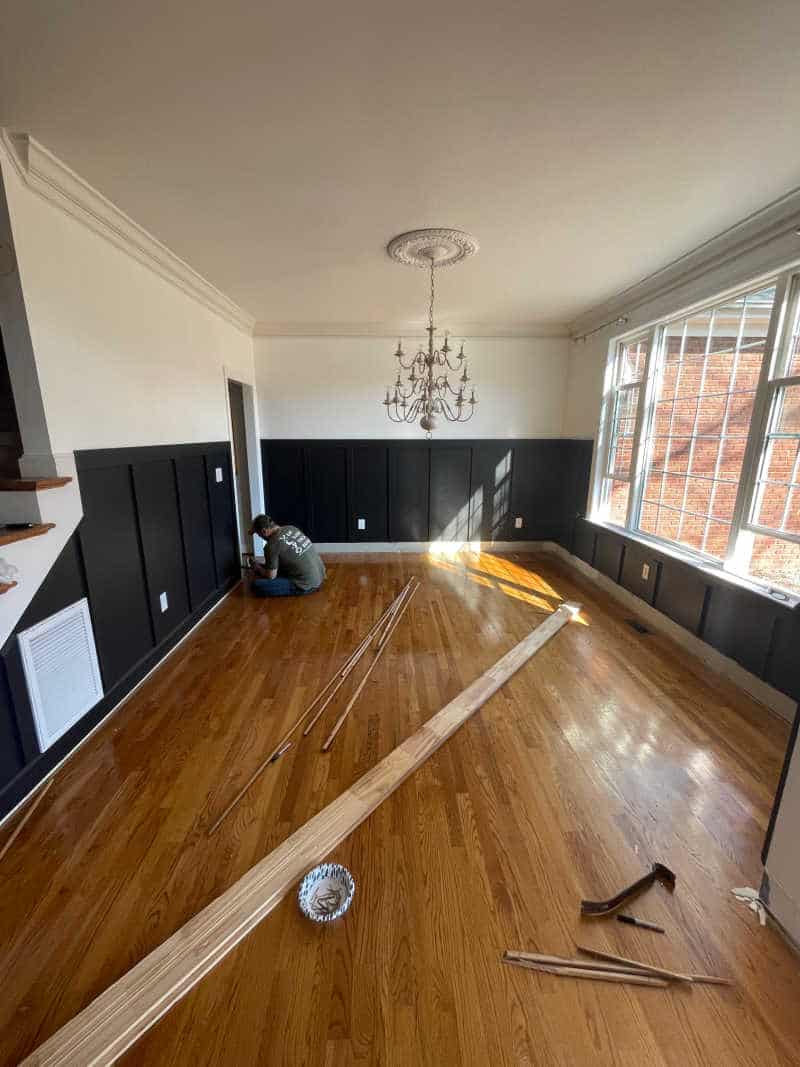
Prepare your home
- Remove everything (furniture, art, mirrors, appliances)
- Remove shoe molding
- Cover light fixtures with plastic (trash bags work too)
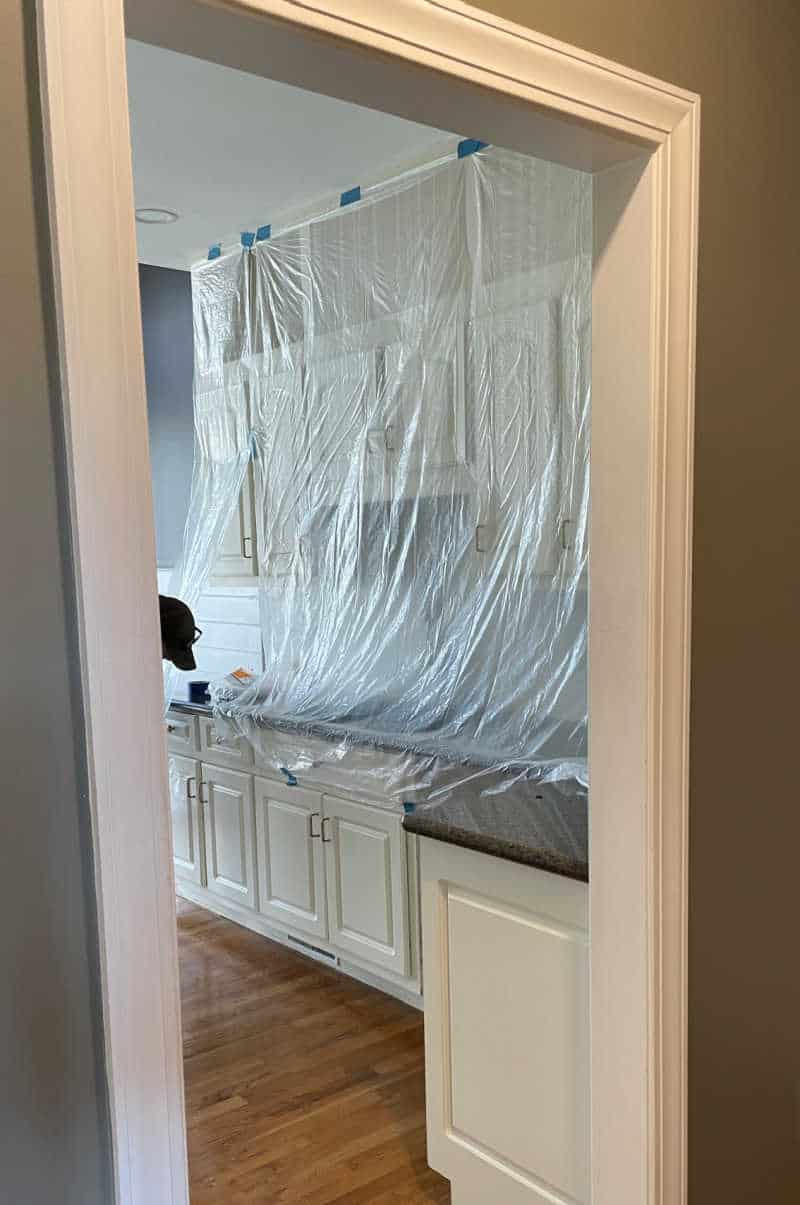
- Cover kitchen cabinets with plastic
- Turn off AC Heat unit while sanding and clean up happens
- Close off parts of the home not part of the refinishing project (close doors or use plastic)
Yes, you will have to remove everything from your rooms where the hardwood floors are being refinished.
Shoe molding and Baseboards
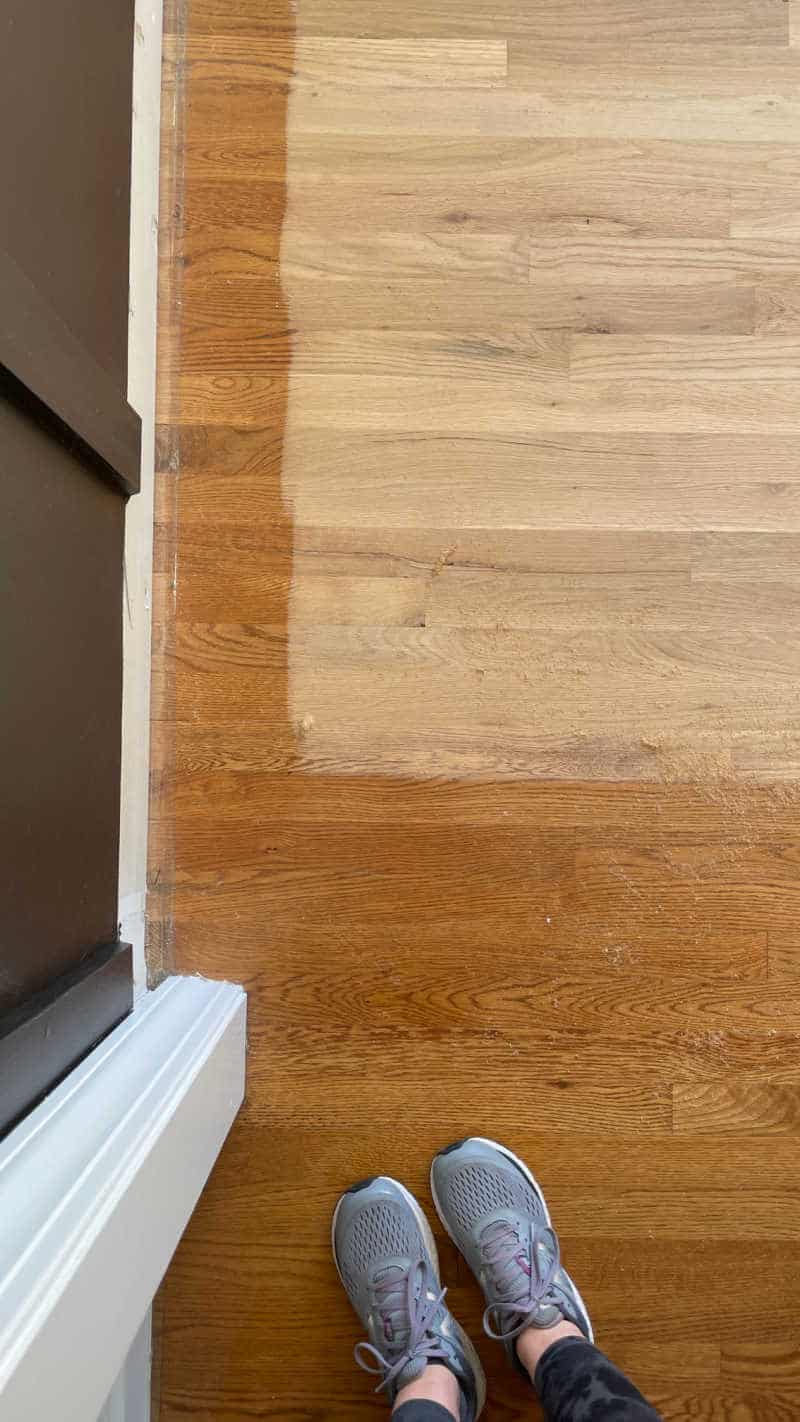
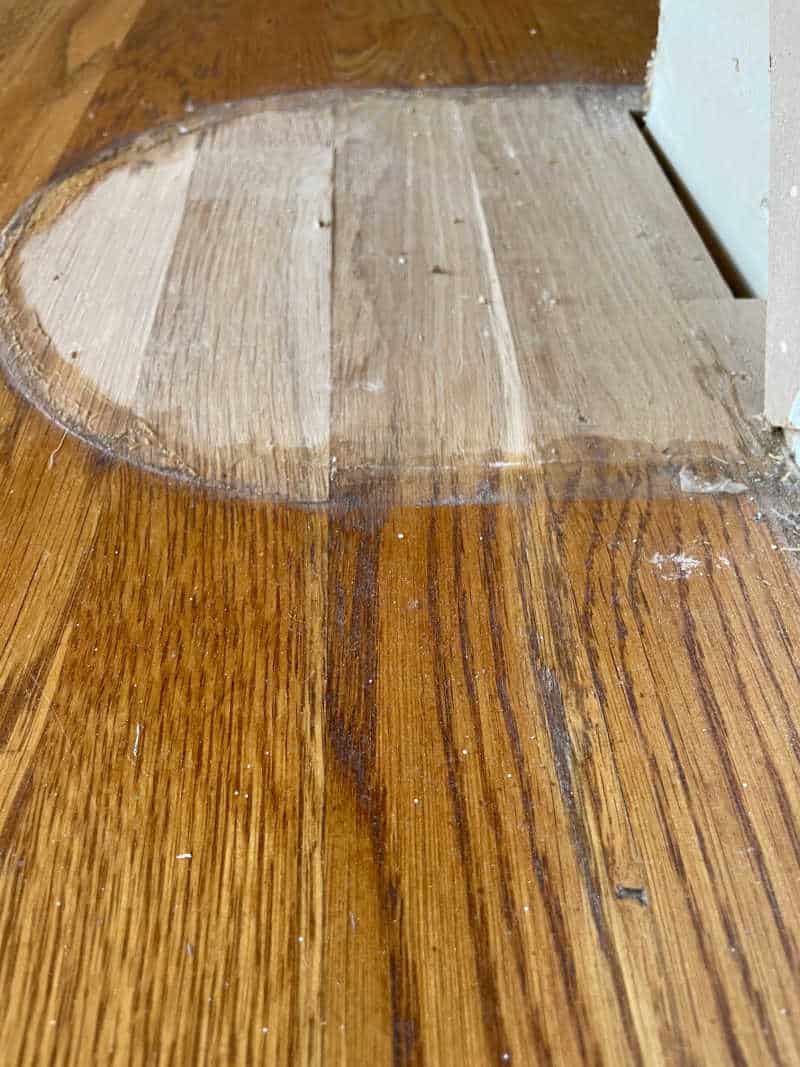
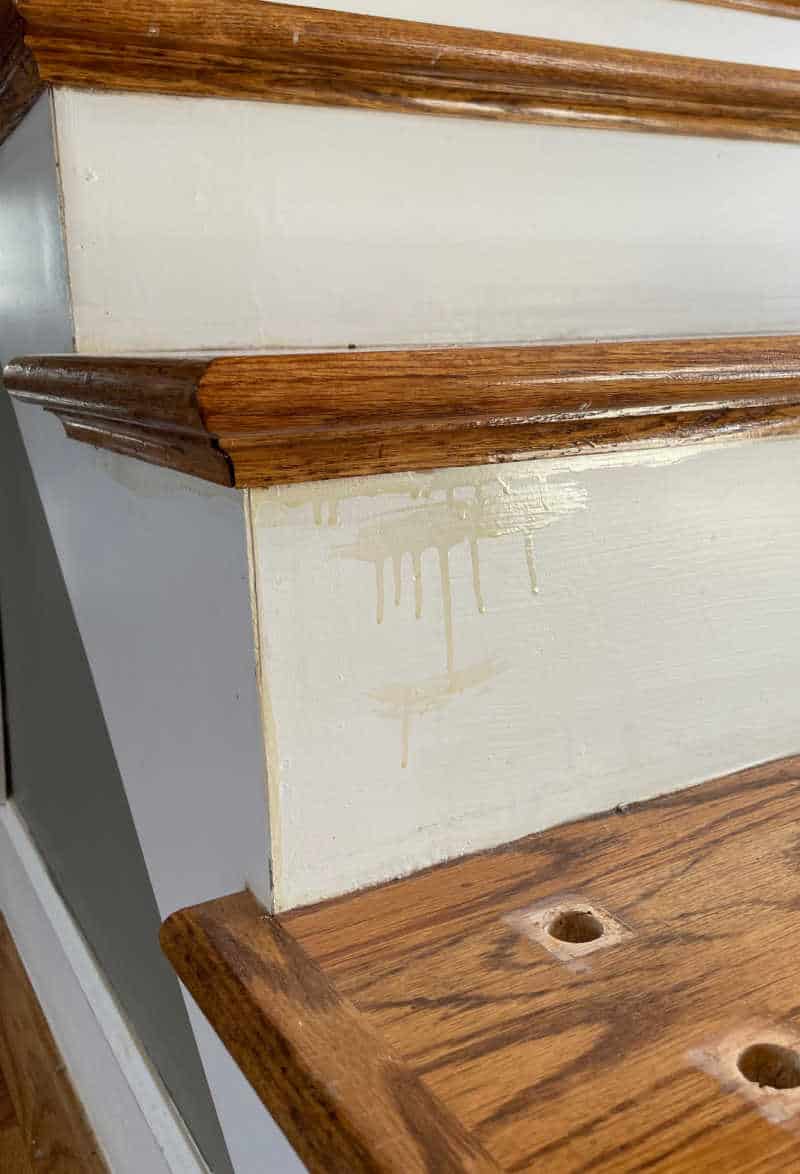
Ask your contractor if they remove shoe molding. They may for an extra fee. Ours required us to do it. I originally thought I wouldn’t add the shoe molding back but I will have to. The floor refinishing can only go so close to the baseboards. You can see the old stain along the edge.
If I would have realized, I could have removed all of the baseboards and then the floor would have been sanded all the way to the Sheetrock. I do not think we would have done this step. Removing baseboard molding is an even bigger project.
We did remove it in the dining room and Ray’s office because it needed replacing. The rest of the house the baseboards just need a fresh coat of paint.
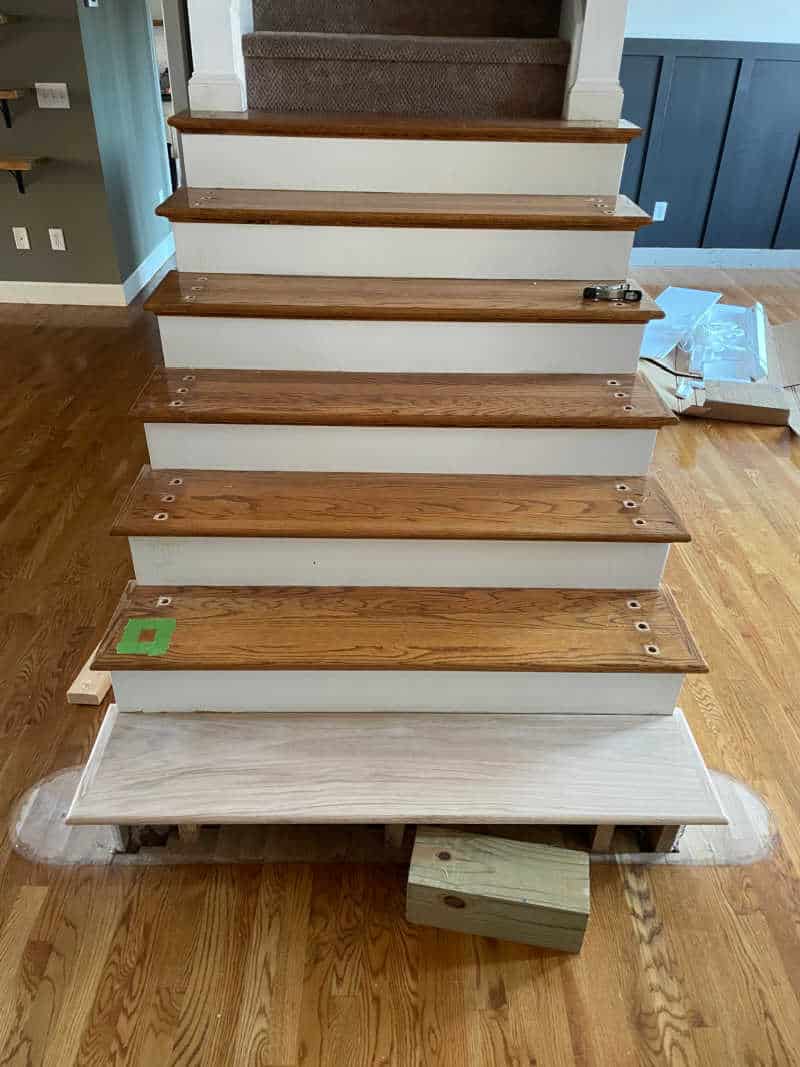
Refinishing Stairs
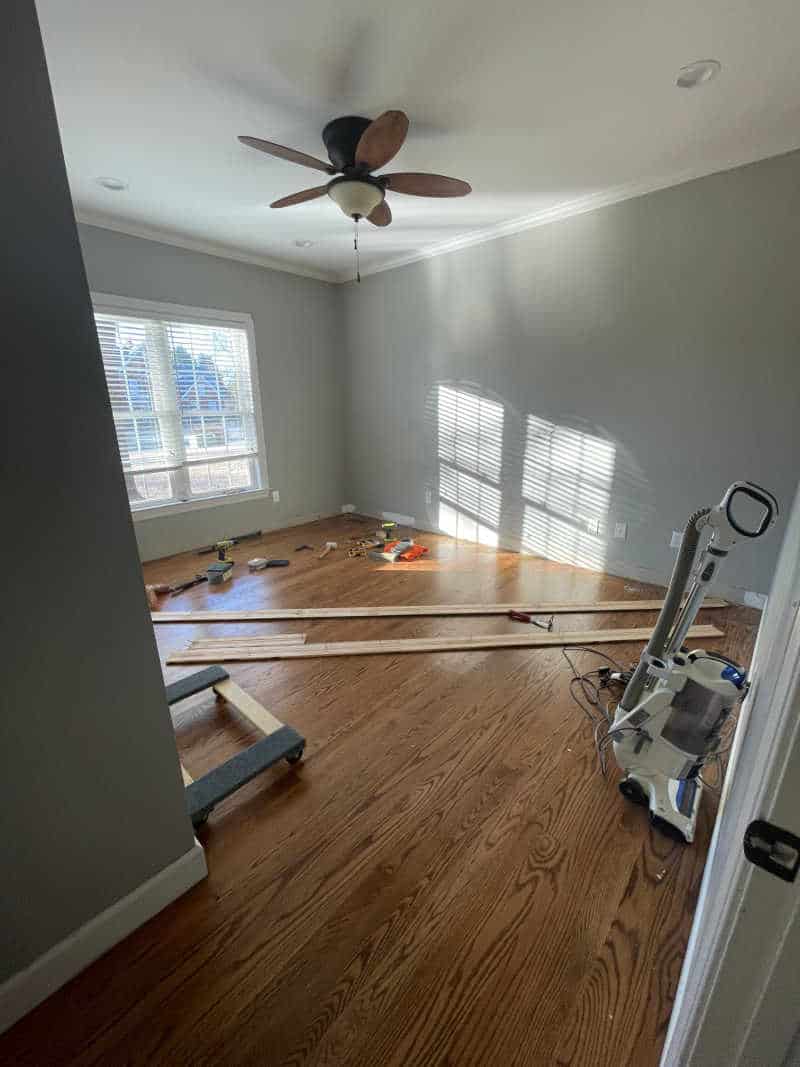
We decided to give our stairs a makeover while we were having the floors refinished. We removed all of the balusters, newel post and hand rail. I wanted a new tread on the bottom step in order to remove the very traditional curve. I will share more as we rebuild this.
If you plan to redo your railings it is a good idea to remove them before the floors are refinished. Otherwise the stair treads will need to be sanded by hand in between the balusters. It is a very tricky area to work around. Also adds additional cost.
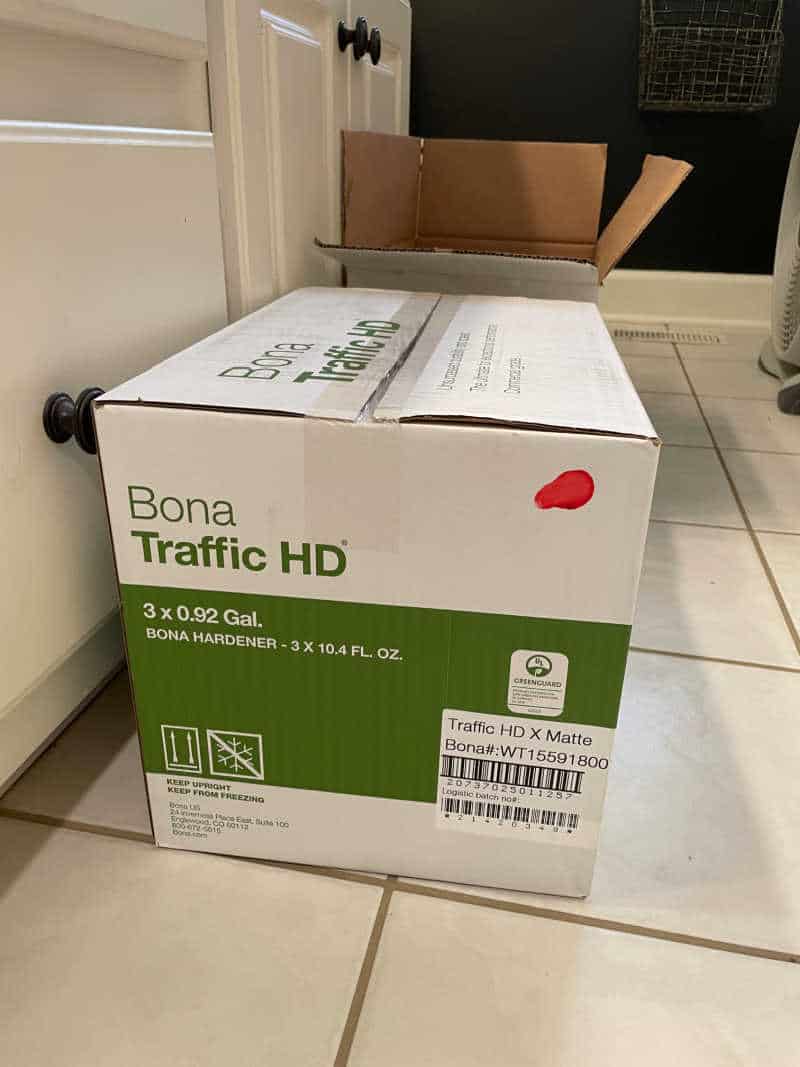
Floor sealer
We chose a Bona Traffic HD water based clear extra matte finish. It was a more expensive option but one I was willing to pay. It cost around $500 more for water based top coat. This product was highly recommended and has great reviews. Guaranteed no yellowing over time.
- matte finish cuts down on floor glares and visual markings
- water based doesn’t cause toxic smells when being applied
- dries quick between coats so process is faster
You can see from the photo below how poly yellows over time. This was a mishap when this house was built. When adding the poly layer over the wood stain someone was messy. They would have missed it because it goes on clear.
I plan to repaint all of our white trim and moldings so this will be covered up soon.
Dust
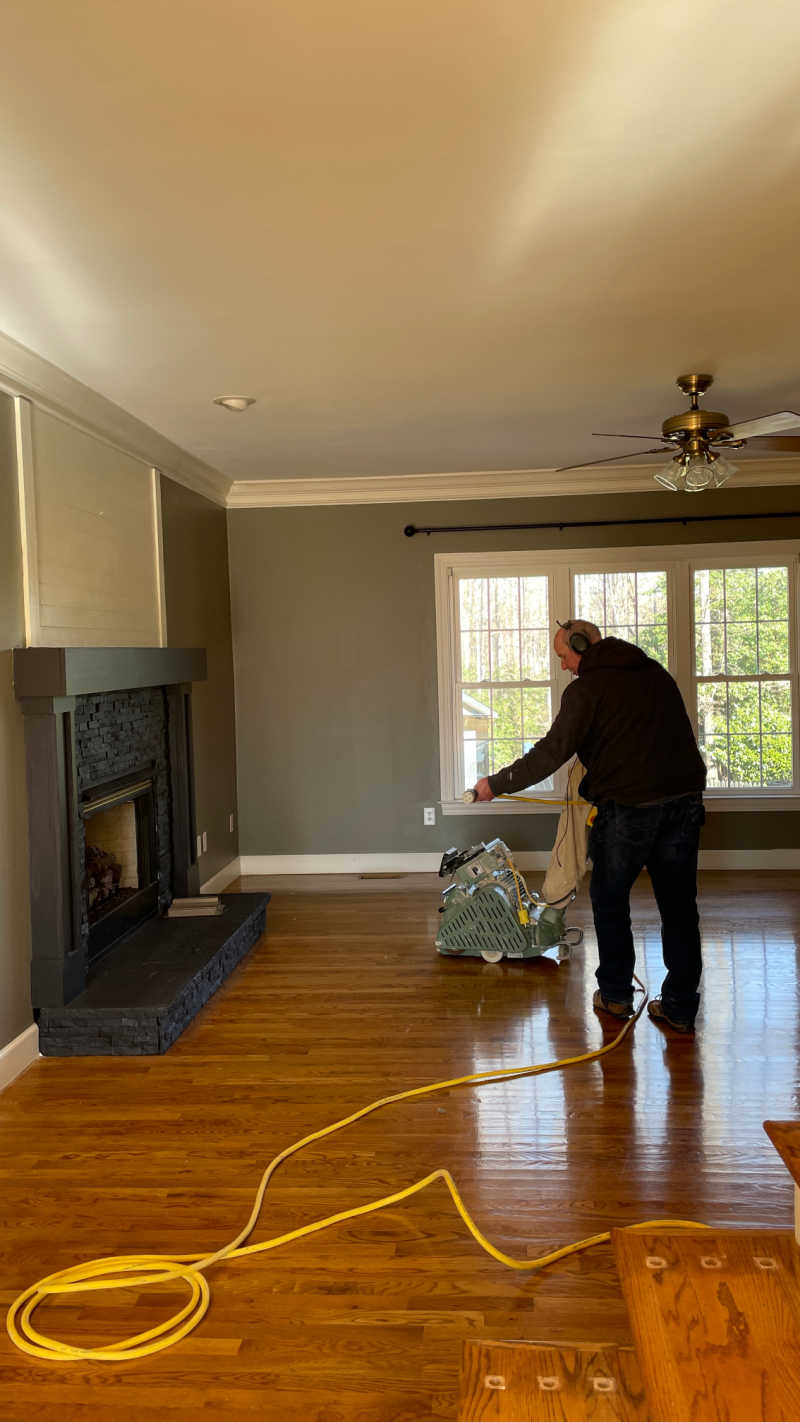
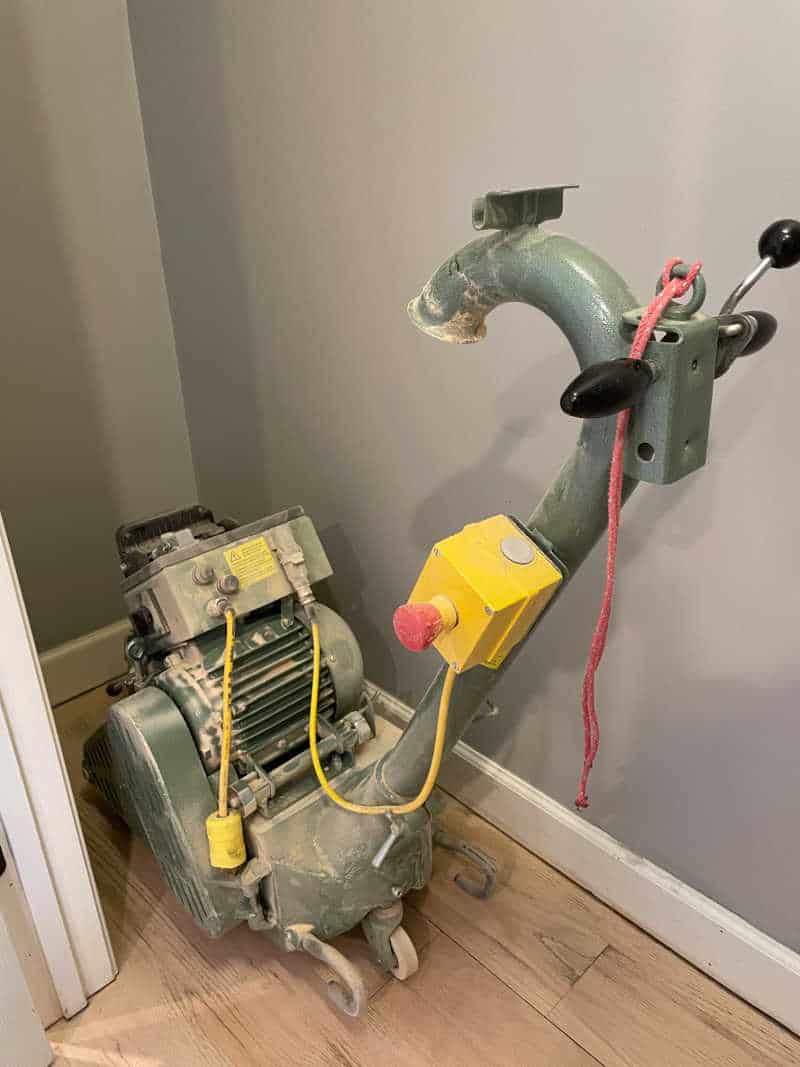
We had dustless sanding BUT this does not mean it’s 100% dustless. There is no way for that to happen. The equipment that was used for our home included a larger sander, a hand held edger and a buffer. I do not know the technical terms for them.
The larger sander that strips off the old finish has a vacuum bag and produces very little dust. The smaller, had held edge sander does has a vacuum bag but it is very small so dust does happen. This is the one that sands the edges, corners and closets.
I have heard horror stories about dust. What I can gather is these people use a bagless sander, very old school, and dust goes absolutely everywhere. Be sure you ask these questions when you are looking for someone to refinish your floors.
I did have to wipe my walls down but because I covered the light fixtures and cabinets with plastic, it helped a ton.
Be sure to remove the plastic as the guys start to clean up. This is a step I made sure to happen. Makes the cleaning process much more efficient.
Important Tip
Turn off your AC/Heat unit during the sanding and clean up. Then during the final cleaning process vacuum out the air returns and vents. This will eliminate recycling dust back into your home.
How long did it take
They started work on a Tuesday at 10:30 and worked until 2:30. Back Wednesday at 10:30 and finished with clean up by 1:00. First coat of Bona sealer went on at 3:00 on Wednesday. This is when we left to stay two nights away. Final 3 coats were applied on Thursday and completed by 6:00 pm.
We came home on Friday about 18 hours after final coat. The water based floor sealant is 80% cure at 24 hours, 100% cured at 72 hours. We were able to walk on the floors with socks only after 18 hours.
Easy Clean up
Be sure you are prepared for the clean up and have microfiber cloths on hand. Chase gave us a bottle of floor cleaner for future mopping specifically for our new floors. He gave use care instructions. Your floor contractor should do the same.
Cost
Cost can range widely depending on the shape of the hardwood floors, the final color, as well as your city. We paid $3980 for 1226 square feet. As avid DIYers we still never considered doing this ourselves. Buying all of the supplies, renting the equipment plus no telling how many hours was not worth any savings to us.
Final thoughts
We are super happy with how the floors turned out. The color makes all of the difference in the overall look of our home and decor.
The main reason to refinish your hardwood floors is to keep the wood protected and looking its best. The decor aspect of it can’t be overlooked though. It really does make a huge difference in your home.
There are other things to take into count when having your floors refinished. You are at the mercy of the wood and other environmental things that may have changed the wood over time. Such as, animals, water damage, fade from the sun, floor cleaning chemicals, etc. Sometimes these things can’t be sanded away.
Now I have new ideas for paint colors and decorating.
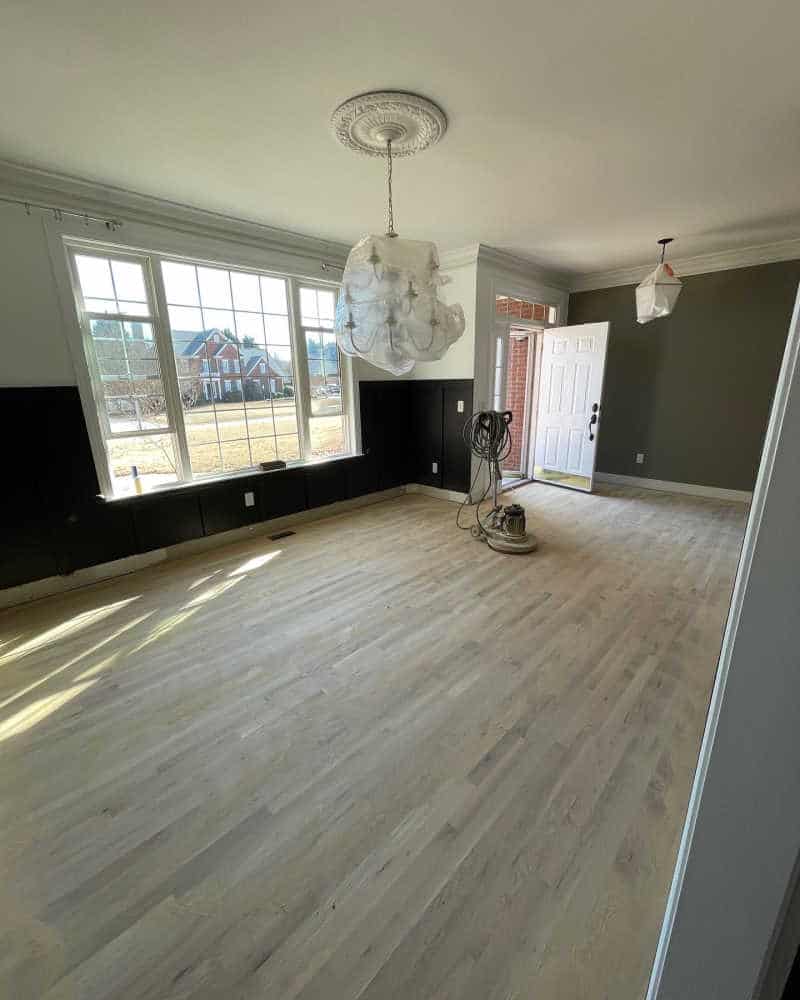
Here are more after photos…
Your sentence about polyurethane is wrong. “Polyurethane is oil based” is an incorrect sentence.
Oil-based polyurethane is oil based, and stated this right on the label. Water based polyurethane is water based, NOT oil based. It states “water based” right on the label.
Stores sell both types. Water based polyurethane clearly states on the front “water based”, which is NOT oil based.
Your floors turned out so good! I really appreciate you sharing your experience working with a professional. I feel like all of the blogs I’ve read only talk about the DIY side of it. I’ve been debating on doing it myself or hiring a professional and I think you helped me decide on hiring someone. Thanks so much for sharing!
Oh hey! Glad you found this post just in time. We have a two car garage that is mostly empty, we placed all of our furniture in there. I helped move most of the stuff but our neighbor helped with the extra heavy stuff.
Great info and descriptions! We are in the beginning stages of researching this topic and I’m curious about how you handled the removal and storage of your furnishings? Almost all of our lower level is hardwoods so I’m envisioning having to rent a pod and have mover help. Did you have to do anything similar? Any details would be very appreciated. PS We’re in the Greenville area, too, and I randomly stumbled across your blog with a google search. It’s a small world!
I enjoyed this article! We also used Bona’s traffic HD three years ago and it’s held up great. The one thing I wish I’d known is that it’s highly reactive with PVC. We used rug pads and they left an unsightly pattern on the floor. You need 100% rubber pads supposedly to avoid ruining the finish. Bona is really snooty about this and talks down “cheap” pads (i.e. all pads not specifically marked 100% rubber). I think Bona’s position is that this is not their issue and you should take it up with the rug pad manufacturer. This isn’t an issue with polyurethane, by the way. Bona is great and I’m really impressed with their educational materials and products, but they were really shady about this issue when I called them. At first they acted surprised I had this issue, but then I found an article on their website with the aforementioned snooty info about rubber. Why not just print a warning on the product?
Thank you for sharing this content. Looking forward to more tips and suggestions regarding Hardwood Refinishing.
🤩🤩🤩
Beautiful floors!✨