How to paint terra cotta pots
Painting terra cotta pots can be done quickly by following these easy steps. Perfect weekend project for all skill levels.
Let’s go ahead and clear the air. It appears to be correct to use the term terra cotta, terracotta, terra-cotta, or clay pot. So I’m going with what feels natural.
Terra cotta pots are beautiful in their natural red orange color, but if your style and decor could use a boost, painting your clay pots could be an easy after noon project. The endless amount of paint colors makes this perfect for any decorating style.

This post contains affiliate links. See full disclosure policy.
If you prefer to keep most of your pots looking more natural then you may like this aged terracotta pots with paint look better.
Find more incredible painted home decor ideas like how to make a new vase look old, painted cement look lamp, or paint a concrete bust.
Painting terra cotta pot supplies
- Terra cotta pots
- Lint Free Cloth
- Primer (spray can)
- Paint (acrylic or latex)
- Paint Brush (love these!)
- Drop Cloth
- Sealer (if you use a different type of paint that needs extra protection)
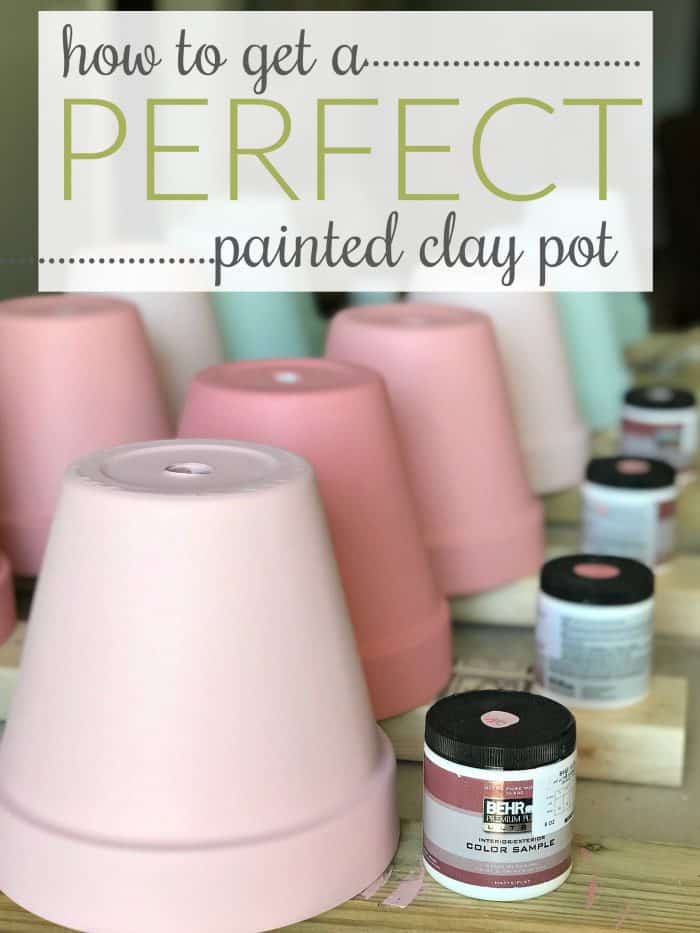
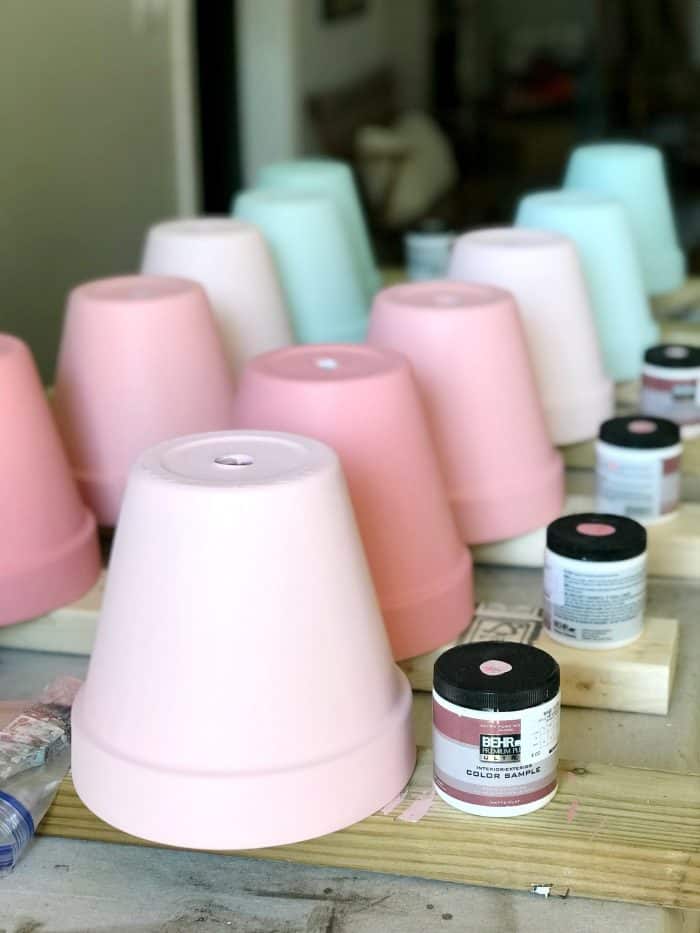
After painting 32 pots this summer for the conference booth, I have it down pretty well. The color palette you will see in this post was part of the Charleston theme for the booth design. All of the colors used here are linked in the booth design and build post.
Steps to paint terra cotta pots
- Wipe down your clay pot with a damp cloth to remove any dust. Don’t soak them with water just get off any dust.
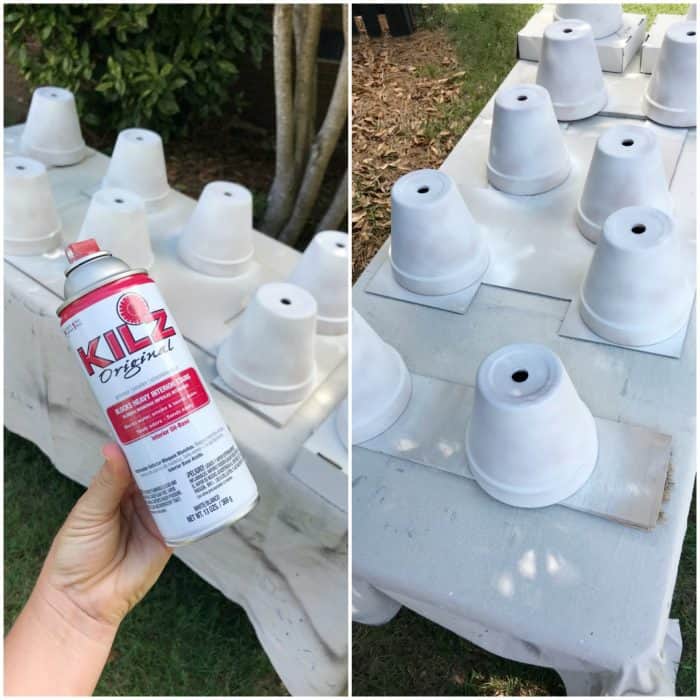
- Prime the the pot with a spray primer to save time. This will need to be done in a well ventilated space like outdoors. Place the pots upside down on a table covered with a drop cloth and cardboard boxes. If you don’t need the bottoms painted then you can place them right side up and go ahead and prime the inner rim of the pot as well. Lifting the pots off of the drop cloth keeps the pots from sticking once sprayed. One can of spray paint covered 7-8 pots with one coat. I used 8 inch terra cotta pots. **A reader said I needed to primer and paint the entire surface if I plan to use with real plants and outdoors. Better safe than sorry.
- Once primer is dry continue using the same table or move indoors for better temperature when you are ready for the paint your color finish.
- Paint the clay pots with acrylic or latex paint. The choice of paint is up to you. I used all latex paint from BEHR on the pots that I had on hand leftover from the booth. Samples sizes are perfect and plenty of paint. Many times I will use paint from around my house left over from other projects. This saves money and the colors already match the decor. I used my favorite nylon angle paint brush.

Paint tips
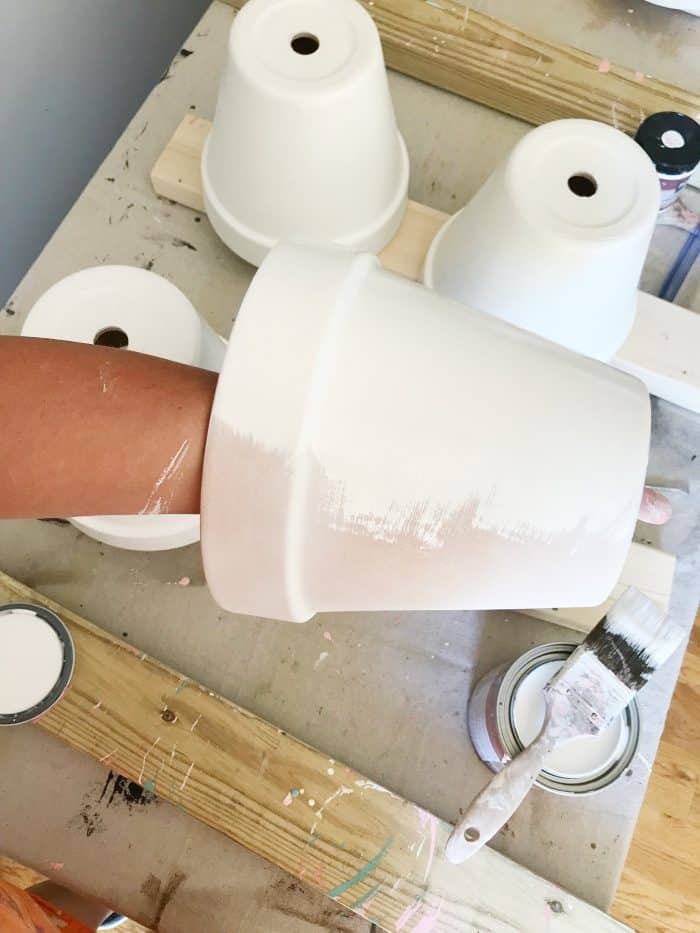
- Hold the pot over your forearm with your hand inside. Put your finger in the bottom to balance the clay pot in order not to drop it.
- Hold your arm and the pot over the drop cloth so you don’t drip paint.
- Paint the pot in the side to side direction instead of top to bottom. I tried both ways and side to side flowed much easier and faster.
- Drag your paint brush slowly in order not to splatter paint. Trust me on this one.
- You could also use spray paint, just as I did here on the primer. This is how to do it if you have leftover paint in jars on hand and are looking to save money.
Reader tip: “You need to paint the pot completely, or your pot will develop blisters and the paint will bubble off. It’s from the water soaking into the clay when you water your plants…..they were designed that way.” (Thank you friends for always offering great extra advice.)
By doing a layer of primer first your painted terracotta should hold up great.


You could go a step further and add your house # or monogram for a fun personalization to your painted pots. Of course, the sky is the limit for color choices. Add Rub n Buff to the rim for a metallic detail. I love it when you all share your projects with me. Leave me a comment below if you try this or you have do it in the past. We can compare notes.
If you prefer to buy pottery pieces ready to use then here are some I thought you may love.


Hey! I listed all of the colors here https://athomewiththebarkers.com/conference-booth-design/
🌸Hi. What colors are in the photo of the clay pots?
Yes, I used the primer spray paint because it is a faster process. You could also use spray paint for the color but I had these sample paints on hand and didn’t want to waste them.
I am a little confused here.
First I see you used Kiltzt paint. This was your primer
Correct?
Next my confusion
Did you use your brush to
Paint the outside? You only
Sprayed the primer.
Thank you for your post and answering my question.
So glad it was helpful for you.
I loved the how to prepare clay pots and paint them … I learned allot
I have painted MANY clay pots always priming them first and spraying them with a clear coat afterwards but they usually bubble up in a year or so regardless. A you tube video says that because the cloudy is porous it needs to be able to breathe even after painting or out will blister when watering the plants. There’s a sealer available called 511 porous plus that is supposed to prevent the paint from bubbling up and allowing the clay pots to breathe when watered. I’ve ordered dinner and I’m hopeful it works!
There are a few things you could do…Use a stencil, free hand writing or you could use Mod Podge and paper. Find scrapbook paper you like with words or print out your own quote. I like to use wrapping paper that is good quality because it can be tricky working with paper. Like this https://athomewiththebarkers.com/thrift-store-lamp-makeover/
How can I add writing to the pots once they’re painted? I want to add a special message for a teacher. Thanks!
Yes. I did that so I could get a consistent color when I painted the pots.
What’s the KILZ for? Are you using that as a primer?
Such an easy project too!
Love your pots, l did a lot of pots myself. I always prime inside out. I also used a sealer inside out . This step will help with watering them.
I wouldn’t personally go to the expense. The pots are inexpensive to purchase and I don’t mind the aging look.
I read a tip to use Thompson waterproof before painting pot. But I wouldn’t think I should waterproof the inside of the pot because that would negate the clay’s porousness.
Use a sealer like the https://amzn.to/2TiQojC
SURE! I would still recommend the primer though because these pots are clay and clay absorbs.
I would use a spray sealer. Something like this https://amzn.to/2TiQojC
Either paint can last and it can also bubble or chip. I used the latex because I had it on hand. Most paint projects are more determined by the prep work.
Oh my lanta! This is awesome! Thank you
My acrylic paint is blistering, and only after perhaps a month. I did prime the pots (with acrylic paint) and, when finished, sprayed them with acrylic lacquer. I am quite disappointed.
I will be checking out the Kilz. I also see you’re using latex paint, whereas I use acrylic craft type paints. Is that significant?
Any tips?.
Hi how do we seal the acrylic paint I’m case of rain
Can you use spray paint?
When you say paint the pot completely, you mean prime/paint the inside and outside, correct?
The Behr paint I used is just a brand. You can use any primer and latex paint.
Hi I do not think the type of paints you suggest are in my local homebase thanks
Or you could just use a foam brush to paint them.
You should be able to get the brush strokes out by sanding with a very high grade sand paper. Maybe a 250 grit.
Thank you for the post,
My question: I leave brush strokes in my pots, how can I fix that?
I would prime the entire pot including inside, you never know what may bleed through. I would also grab a stain blocking primer like this one. I grabbed the affiliate link from Amazon. Primer
How do you get an old pot ready to paint? Do you prime the inside as well?
Thanks so much for the tip. I’ll add the advice into my post. ~Sonya
You need to paint the pot completely, or your pot will develop blisters and the paint will bubble off. It’s from the water soaking into the clay when you water your plants…..they were designed that way.
These are adorable, Sonya! Love the slight variation in shades. This would be such a cute planter wall on a back porch or back yard!