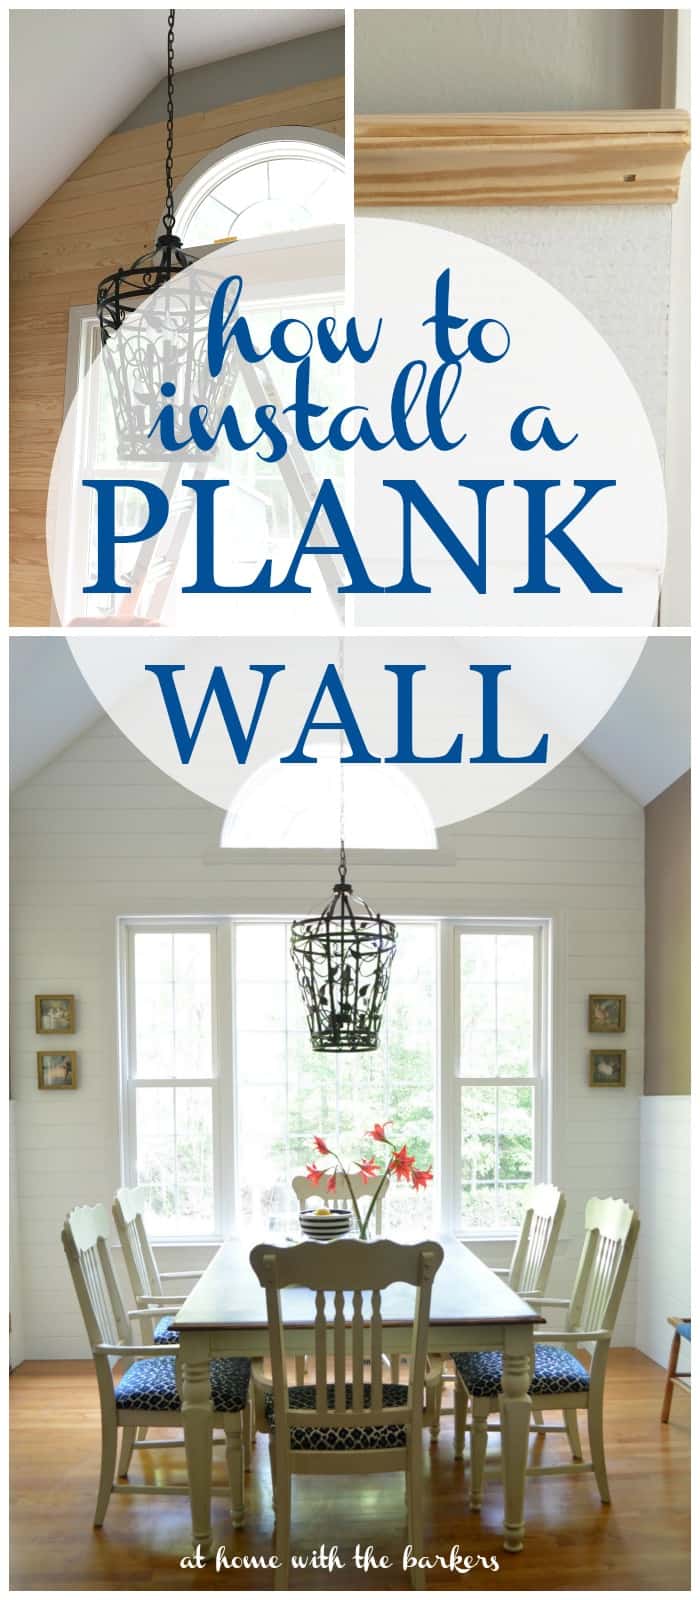
How to Install a Plank Wall
Oh my friends, it’s been a few weeks since the kitchen makeover was complete and there are lots of detail posts that I had promised you including how to install a plank wall. After we finished the kitchen makeover I felt the real need to make lots of things in the house neat again. You understand I’m sure. When one room is getting the royal treatment, the others are NOT!
The need to get rid of lots of things, clean, organize, and purge was overwhelming. I asked for this book for Mother’s Day and it has totally changed my way of thinking and doing when it comes to my home. I got busy right away which is why I haven’t blogged about all of the kitchen details until now.
I have always loved making our house a home but not just because of the “things” that make it pretty but because of the feeling I want to evoke for my family. GOD blessed me with this home and family, making it a place of refuge is my hearts longing.
Anyway….heres how to install a plank wall.
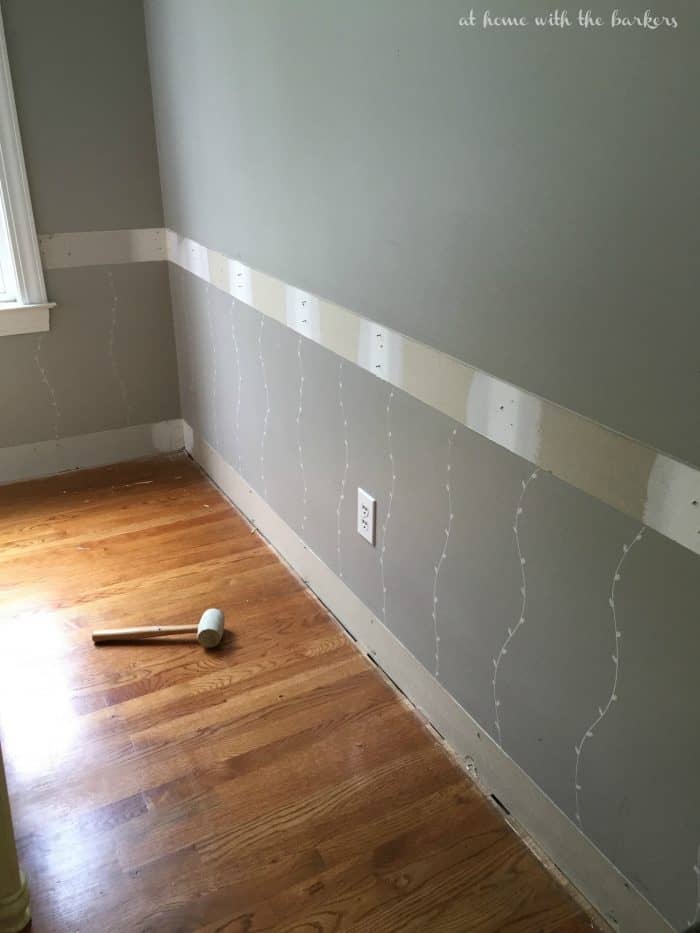
We had an outdated trim going around our room that we had to remove. If you need to know how to do that you can read about it here where we did the same in the dining room.
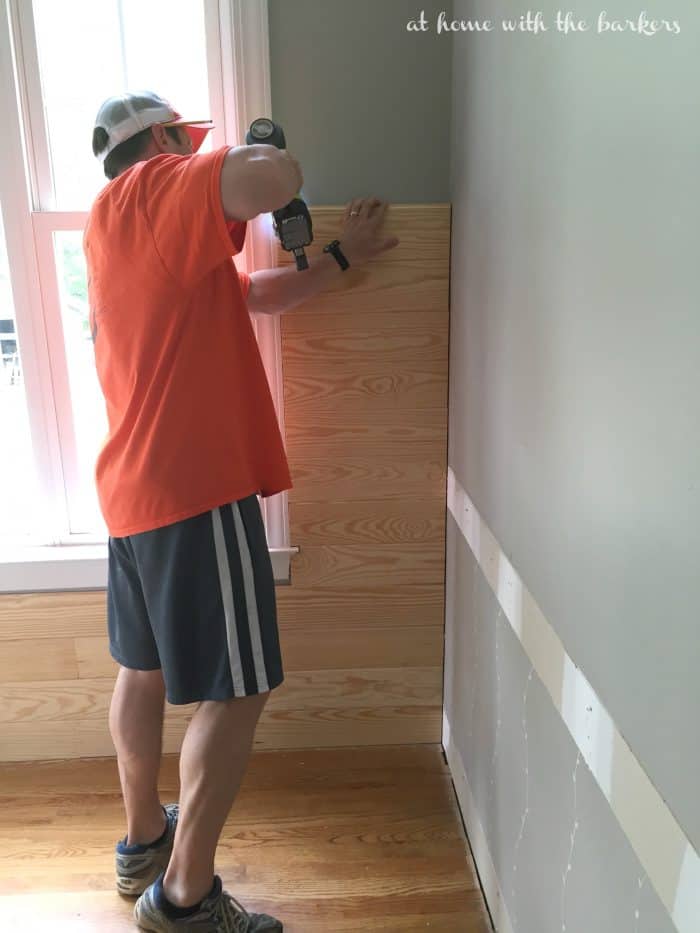
For our plank walls we used 6 inch tongue and groove pine boards that we bought from the home improvement store. We purchased 8 foot and 10 foot length boards. The wall you see in the below photo is where we used the 10 foot boards. I didn’t mind the seams but I wanted to keep them to a minimal. I also bought the mid grade wood without all the knots.
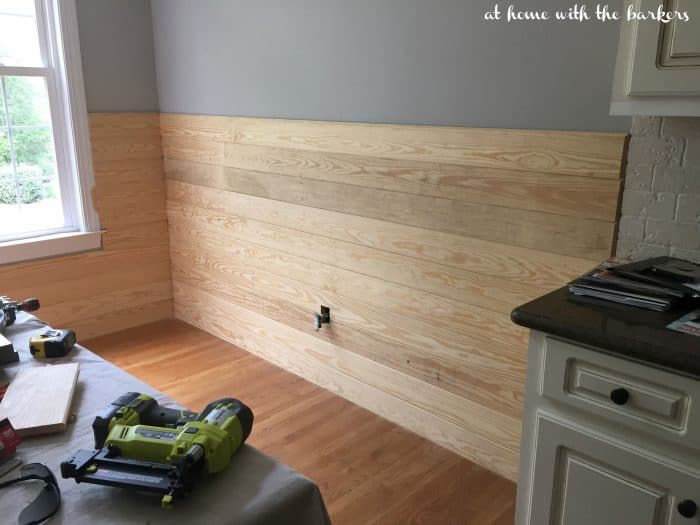
Putting the planks together is pretty simple. They fit right into each other. We then used our Ryobi finish nailer to secure them together. We nailed above the board near the groove so the nails would be hidden.
I must tell you this before I go any further…make sure that your VERY first board is level before it is nailed in the wall. Walls and floors shift over time so NEVER think you can line the first board up with the floor and you are good, BIG mistake.
The second thing I must tell you before I go any further…this one was learned after about an house of frustration. As you can see from the small sides by the window we were trying to use any of the cut ends from the long boards keeping a close eye on staying level from side to side. BUT the higher up the wall we would go the more uneven the sides became! Here is what we realized, the 8 foot boards and the 10 foot boards were not the exact same width…ARGH!!! They were off just enough that had we used the different sizes by the time we got to the top of the window there was a big difference.
Take our advice and buy all of your boards the same length if possible, if not make sure they are the same width.
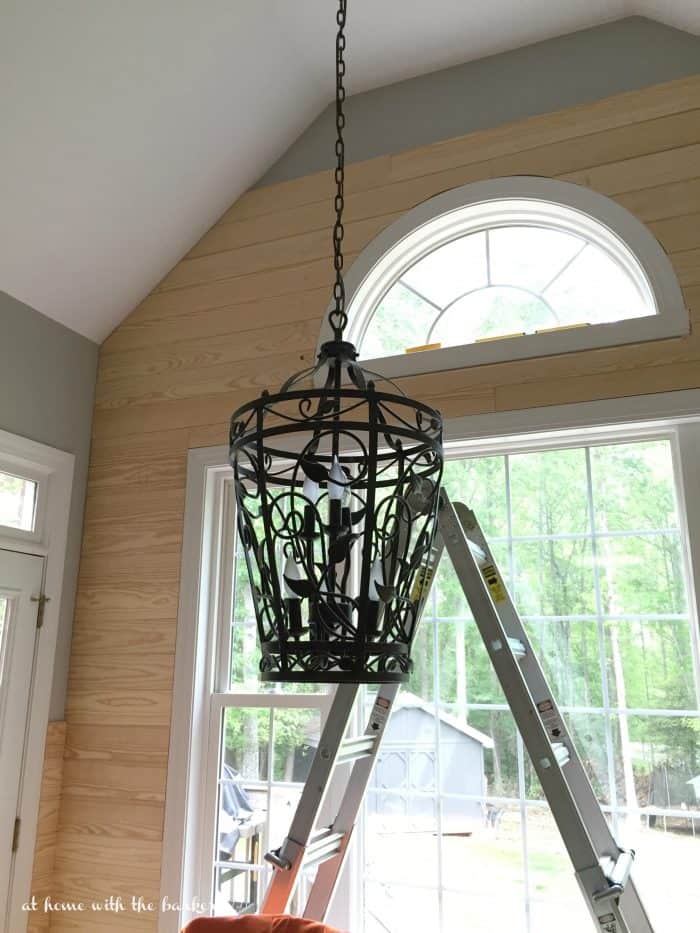
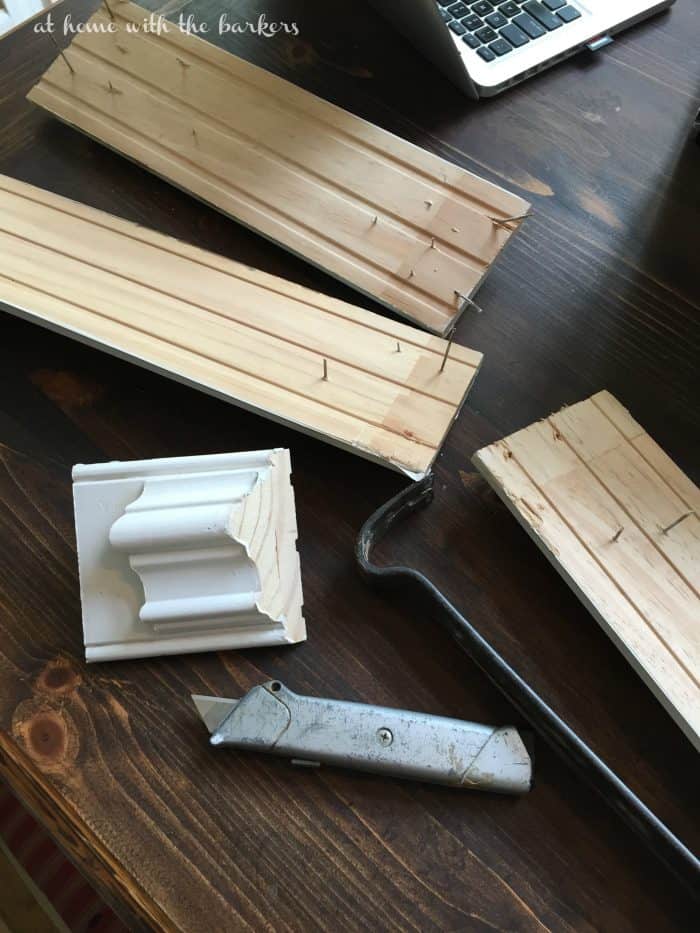
My mathematical husband was able to figure out the arch, board by board for the half moon window. I’m not gonna lie…I was useless there. This is not for beginners and if you want to try it have some extra planks and patience, LOL!
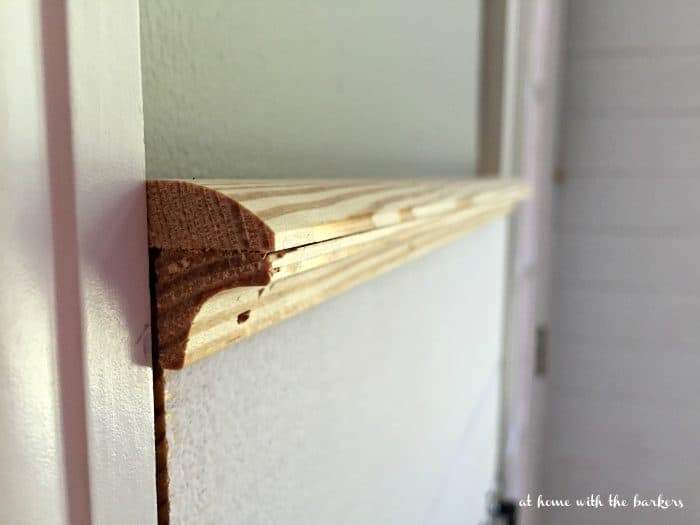
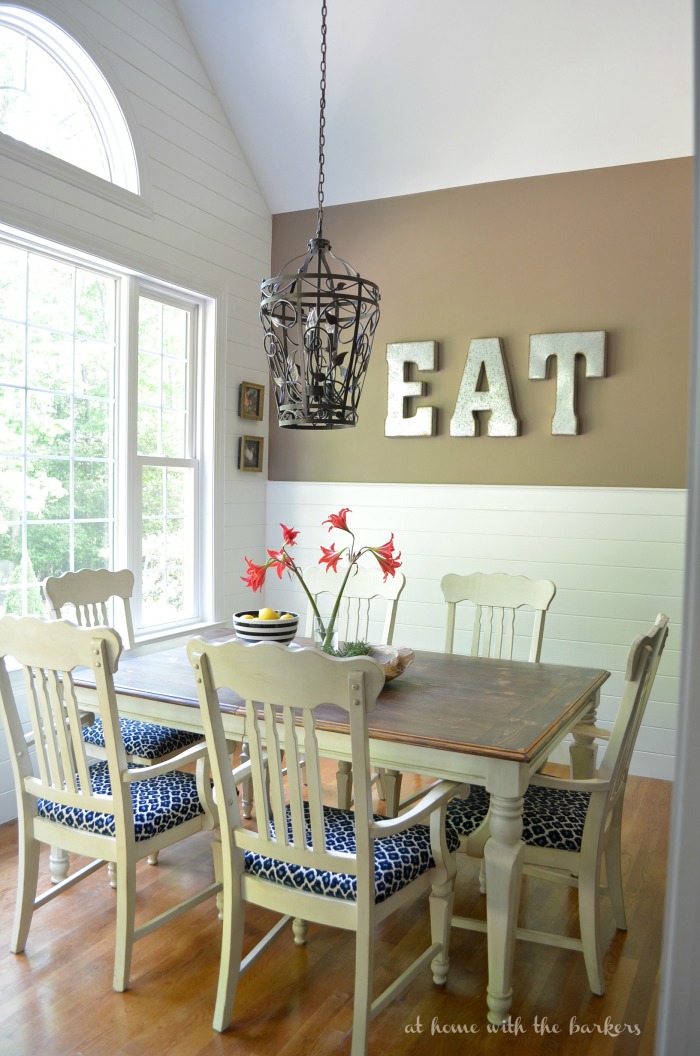
I decided that I wanted to back wall to go to the ceiling but not the side walls. I wanted some painted wall space. To give the sides a finished look we bought two types of finish trim and added that. There are many choices so they pick what you like best.
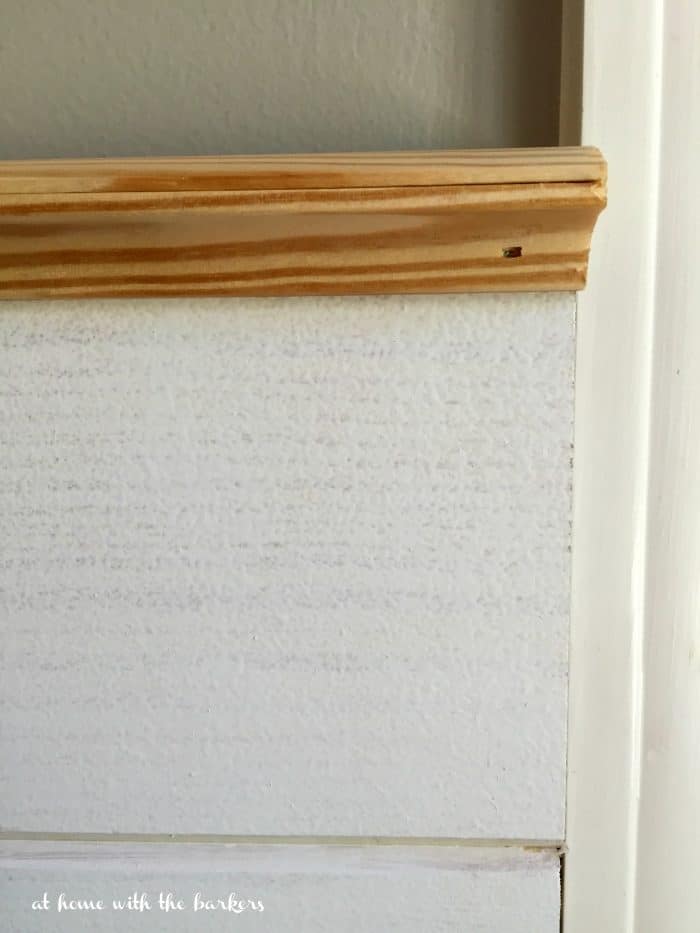
Then the fun part begins…PAINT! I use to hate to paint and only did it because we were poor. Really it’s true but over time I have come to love it. I primed first then painted it all white. Blanched Pine is the color. It’s not pure white which is what I love.
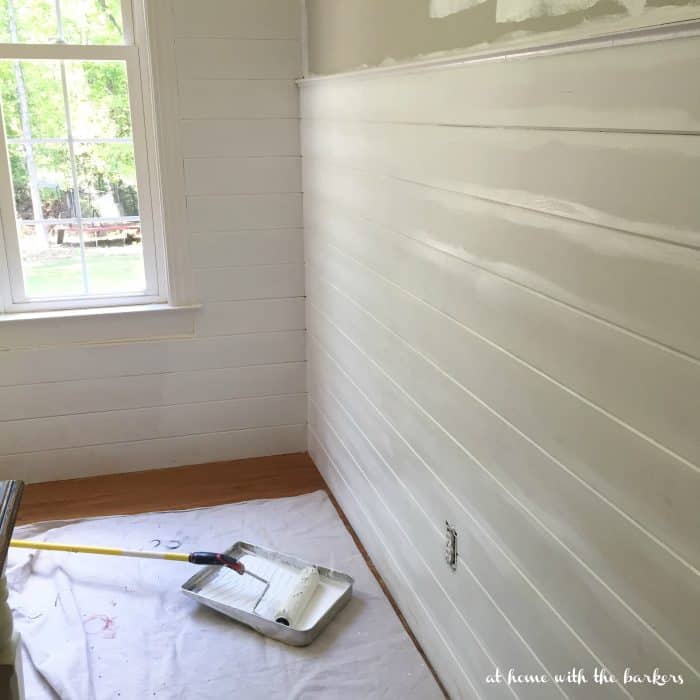
The best way to paint tongue and groove is to use a brush to paint inside the cracks first. in the below pic you can see the wet paint over the primer. Then use a roller for the rest.
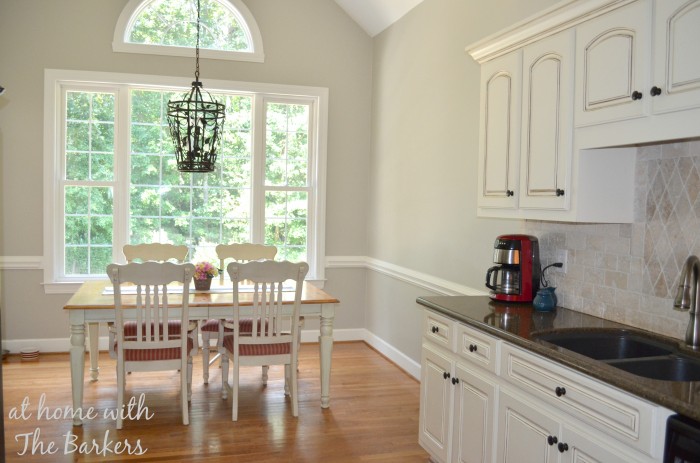
I love my plank walls so much. Here’s a quick peek at the room before the before…
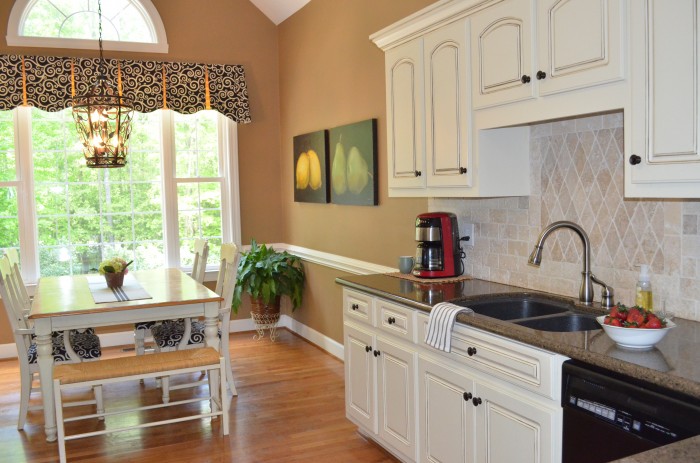
then the before….
THE AFTER…

I’ll be posting about more of the kitchen makeover details soon.
I have already shared how I recovered the kitchen chairs HERE.
Be sure to add your email to my subscriber list at the top of the page so you will be first to see all new post. The kitchen makeover was a 6 week project that you can see from the beginning at WEEK 1.

Linking to: Remodelaholic
YAY! Thank you for the kind words. Good luck with you project.
You have inspired me! I’m starting a new project today, planking the wall above my fireplace! Love your tips, your pictures, great ideas for those of us that desire to update our home but don’t necessarily have much of a budget!
Hi Sonya! What is the wall color after you did the planking (which looks beautiful by the way)!! Also, we also have an arch window and would like to do the planking on it – how did you do the molding around it?
Thanks so much for sharing!
What color gray was it before?
Your planking looks professionally done! Very tasteful upgrade! Thanks for the plank wall tips. I am about to start one myself.
That arch? No way would I have been able to make those cuts! This looks great. You guys did a great job!
It looks fantastic!! I love that you left some regular wall too.
Super smart!!
Makes it fun to change out an accent color that way 🙂
Thank you so much!
Wow, what a difference. It looks fantastic. All that hard work has really paid off!